
Headlight Restoration - My Take


Thread Starter
|
KWITCHERBITCHIN
Joined: Sep 2007
Posts: 6,024
From: Gallatin, TN
First of all, I want to start with a little disclaimer.
**I highly recommend researching tips on how to properly wet sand, as well as how to properly use your Porter Cable buffer. Use this tutorial as a small guideline as to how to properly restore your headlights, but remember all results will be different. Use this how-to at your own discretion.**
Ok. This is my experience with restoring my headlight housing on my '03 Stratus. I would imagine that these results could be applied to any plastic housing on any car.
*Big thanks to Pcola and others who have posted tips on this same subject!*
I unlike some WOULD NOT do this without my Porter Cable. The amount of polishing needed would take a lengthy amount of time and I honestly don't know that you could get the same results without it.
1. Before


As you can clearly see, the headlights had some serious oxidation and hard water staining. Luckily for me, it was not covering the entire headlight. This was more than just a simple yellowed or stained headlight, you could physically FEEL the deformation of the plastic.
2. Preparation

You should always start out with a completely clean surface to work with, especially when you are going to do any sanding. You may want to use a clay bar as well, but I had already recently clayed the car. I did use some dishsoap as well as my sea sponge to scrub and bugs/ road grime off.
**This should also give you an idea of how wet to keep the housing, I used warm water with a decent amount of dishsoap while sanding. KEEP YOUR SURFACE SOAKING WET THE ENTIRE TIME!.**
3. Sanding step 1 - 600 Grit.


As you can see, this is where that lump in your throat really starts to form.
4. Sanding step 2 - 1000 Grit


The lump in your throat and heart beat should both be increasing at this point.
5. Sanding step 3 - 2000 Grit


Now, you're having trouble breathing and you're asking yourself "Why the hell am I doing this?!?"
6. The fun part!


Now, this is the part that you should be getting excited. I started out using Meguiars ScratchX on my PC Orange cutting pad and followed up with my Meguiars PlasticX.
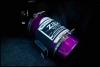
The products that I used.


**I highly recommend researching tips on how to properly wet sand, as well as how to properly use your Porter Cable buffer. Use this tutorial as a small guideline as to how to properly restore your headlights, but remember all results will be different. Use this how-to at your own discretion.**
Ok. This is my experience with restoring my headlight housing on my '03 Stratus. I would imagine that these results could be applied to any plastic housing on any car.
*Big thanks to Pcola and others who have posted tips on this same subject!*
I unlike some WOULD NOT do this without my Porter Cable. The amount of polishing needed would take a lengthy amount of time and I honestly don't know that you could get the same results without it.
1. Before
As you can clearly see, the headlights had some serious oxidation and hard water staining. Luckily for me, it was not covering the entire headlight. This was more than just a simple yellowed or stained headlight, you could physically FEEL the deformation of the plastic.
2. Preparation
You should always start out with a completely clean surface to work with, especially when you are going to do any sanding. You may want to use a clay bar as well, but I had already recently clayed the car. I did use some dishsoap as well as my sea sponge to scrub and bugs/ road grime off.
**This should also give you an idea of how wet to keep the housing, I used warm water with a decent amount of dishsoap while sanding. KEEP YOUR SURFACE SOAKING WET THE ENTIRE TIME!.**
3. Sanding step 1 - 600 Grit.
As you can see, this is where that lump in your throat really starts to form.
4. Sanding step 2 - 1000 Grit
The lump in your throat and heart beat should both be increasing at this point.
5. Sanding step 3 - 2000 Grit
Now, you're having trouble breathing and you're asking yourself "Why the hell am I doing this?!?"
6. The fun part!
Now, this is the part that you should be getting excited. I started out using Meguiars ScratchX on my PC Orange cutting pad and followed up with my Meguiars PlasticX.
The products that I used.
Last edited by WNRacing; Apr 12, 2008 at 04:36 PM.

Senior Member
Joined: Apr 2008
Posts: 232
From: Northern Virginia
thats a lot of work. i just got this plastic cleaner,(my headlights were like that, but the whole thing.) i just put this plastic cleaner, says its for black parts like the side mirror plastic, or anything black. i was curious and tried it on a penny size spot on the headlight. pulled the deformation **** right off. i did it to the whole thing and they came clean, good as new, the test is, when i get back from college will they be foggy, ill update with results. nice post tho. "my" way is just a quick fix i guess.
Thread Starter
|
KWITCHERBITCHIN
Joined: Sep 2007
Posts: 6,024
From: Gallatin, TN
thats a lot of work. i just got this plastic cleaner,(my headlights were like that, but the whole thing.) i just put this plastic cleaner, says its for black parts like the side mirror plastic, or anything black. i was curious and tried it on a penny size spot on the headlight. pulled the deformation **** right off. i did it to the whole thing and they came clean, good as new, the test is, when i get back from college will they be foggy, ill update with results. nice post tho. "my" way is just a quick fix i guess.
My choice was to either spend the $20 for the materials to attempt to fix it or $250 for a new housing!
")

Super Moderator
Joined: Jan 2005
Posts: 3,440
From: Northern Va
2. Preparation
You should always start out with a completely clean surface to work with, especially when you are going to do any sanding. You may want to use a clay bar as well, but I had already recently clayed the car. I did use some dishsoap as well as my sea sponge to scrub and bugs/ road grime off.
You should always start out with a completely clean surface to work with, especially when you are going to do any sanding. You may want to use a clay bar as well, but I had already recently clayed the car. I did use some dishsoap as well as my sea sponge to scrub and bugs/ road grime off.

Super Moderator
Joined: Sep 2004
Posts: 6,312
From: Mexico
Excellent write up...that can easily be done with a mother power ball as well! You still have to sand it down and then do the buffing with the power ball! Thats what I did on my stang and it looked great..

THE ONLY DARK GREEN VERT
Joined: Jan 2008
Posts: 466
From: denver
nice write up!
i paid $0 dollars to have mine done! lol
the "headlight and bumper" guys were at the dealer when i bought mine. I just walked over and asked them to get the Mustang asap since it was being purchased :-D
cleaned up perfectly!
i paid $0 dollars to have mine done! lol
the "headlight and bumper" guys were at the dealer when i bought mine. I just walked over and asked them to get the Mustang asap since it was being purchased :-D
cleaned up perfectly!

Bottle Fed V6
Joined: Mar 2008
Posts: 2,086
From: Tampa, Florida
But as far as cost, I spent just a couple dollars on the sand paper and the Plastic X (didn't use Scratch X on mine). Doubt you'll find a place to do it cheaper than yourself...


Junior Member
Joined: Apr 2008
Posts: 29
Brasso works great for plastic headlight covers. My brothers 96 Ram was so bad they weren't worth a damn at night. Really yellow. A shop rag and Brasso they became clear as a bell. They were actually usuable again. We hit em about 3 times with Brasso. Rag was really dirty. Didn't have to scrub them that hard.
Last edited by Hawkin; Apr 16, 2008 at 01:41 PM.
yeah.. haha that's what I figured...
Sounds good to me! At least it's on a 98. Small headlights. : D
You don't need the tools really, just need some elbow grease. I did mine awile back by hand and it turned out perfect, you have more control I think. Did one light one day, and the other the next, your arm WILL get tired lol. If I had to do it again, I'd definatly want the Porter Cable though.
But as far as cost, I spent just a couple dollars on the sand paper and the Plastic X (didn't use Scratch X on mine). Doubt you'll find a place to do it cheaper than yourself...
But as far as cost, I spent just a couple dollars on the sand paper and the Plastic X (didn't use Scratch X on mine). Doubt you'll find a place to do it cheaper than yourself...
Bottle Fed V6
Joined: Mar 2008
Posts: 2,086
From: Tampa, Florida
Haha yeah. I can see the pure white glaze on your dad's 98 in your sig lol. Show us how it turns out!

Thread
Thread Starter
Forum
Replies
Last Post
03, 2001, cable, damage, experiences, ford, forums, headlight, headlights, mustand, mustang, porter, renew, restoration, sun