Painting Calipers The Better Way
#1
Alright i'm going to be walking you through the steps and giving tips on how to paint your calipers properly and effectively. This is moderatly difficult you need to know how to do a brake pad install if not i'll do my best to take apart the caliper so it is paintable.
Some things you need to know....
Now as you know there are 2 kinds of caliper painting way. One get a kit such as Duplicolor or G2. The problem is with this is you do not get full coverage with the brush on paint.
Now as much as you think this stuff will last forever it wont. These paints are ceramic based paint to withstand heat. And are a sort of "rubber wrap" after drying. Now Duplicolor can withstand 500 degrees. Thats good but I recently discovered VHT brake caliper spray paint withstands a 900 degrees and its cheaper by the cans meaning more coats=lasts longer.
Since this is a kind of rubber wrap ceramic paint it makes sense that more coverage is going to be bett so taking off the caliper is most effective.
Lets begin.
Tools:
12 mm Socket
Ratchet
5/8 wrench
Large C-clamp
2 jackstand and jack
VHT High Temp Brake Caliper paint (Color of your choice)
Brake Cleaner (may need 2 cans if you dont clean your brakes)
High temp brake grease
Disk Quiet gel
Sander (you will find out this is difficult and time consuming)
Carbon Steel Wire Brush (Very effective-a must if you have to remove paint already)
Tooth brush, rags, newspaper
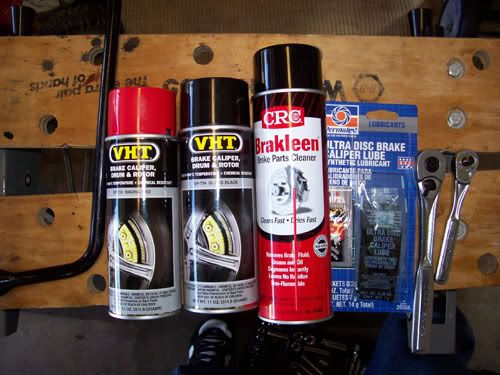
Always make sure you have everything you need ahead of time once its on jacks you dont want to be driving your car for a hours after your done painting.
*Safety first please use jackstands for your safety and your cars safety.*
First off take your time no reason to rush everything takes hours to cure but I recomend doing 2 wheels at a time.If you dont know how to jack up your car and take off your wheels please stop reading and leave now.
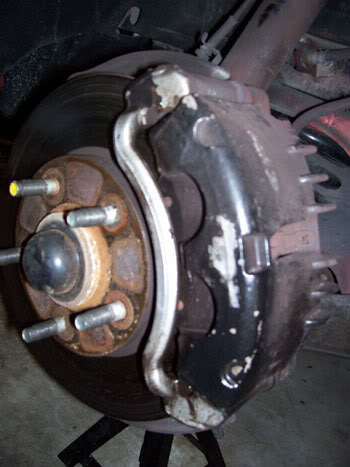
As you can see my last time I used caliper paint I used Duplicolor and I kept it clean and yet still degraded terribly.
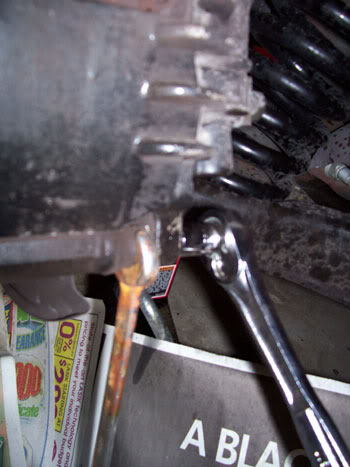
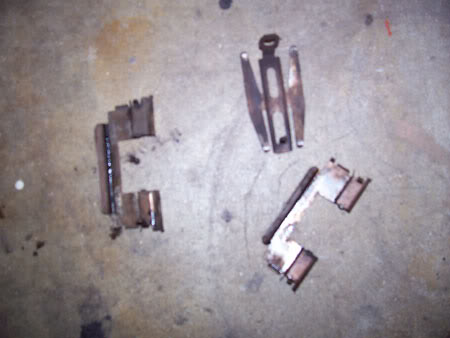
What I am doing here is taking the 12mm socket and 5/8 wrench and removing the 2 bolts on the back of the caliper one at the top the other at the bottom. after removing these you can use a C-clamp to press the pistons back. Remember to take off all metal slide and pieces and save and clean them as shown.
*Inspect your brakes if you pads are worn this is a good time to get new ones or if the metal pieces are worn or in bad condition replace them. Your brakes are important and need to be cared for properly*
Some things you need to know....
Now as you know there are 2 kinds of caliper painting way. One get a kit such as Duplicolor or G2. The problem is with this is you do not get full coverage with the brush on paint.
Now as much as you think this stuff will last forever it wont. These paints are ceramic based paint to withstand heat. And are a sort of "rubber wrap" after drying. Now Duplicolor can withstand 500 degrees. Thats good but I recently discovered VHT brake caliper spray paint withstands a 900 degrees and its cheaper by the cans meaning more coats=lasts longer.
Since this is a kind of rubber wrap ceramic paint it makes sense that more coverage is going to be bett so taking off the caliper is most effective.
Lets begin.
Tools:
12 mm Socket
Ratchet
5/8 wrench
Large C-clamp
2 jackstand and jack
VHT High Temp Brake Caliper paint (Color of your choice)
Brake Cleaner (may need 2 cans if you dont clean your brakes)
High temp brake grease
Disk Quiet gel
Sander (you will find out this is difficult and time consuming)
Carbon Steel Wire Brush (Very effective-a must if you have to remove paint already)
Tooth brush, rags, newspaper

Always make sure you have everything you need ahead of time once its on jacks you dont want to be driving your car for a hours after your done painting.
*Safety first please use jackstands for your safety and your cars safety.*
First off take your time no reason to rush everything takes hours to cure but I recomend doing 2 wheels at a time.If you dont know how to jack up your car and take off your wheels please stop reading and leave now.

As you can see my last time I used caliper paint I used Duplicolor and I kept it clean and yet still degraded terribly.


What I am doing here is taking the 12mm socket and 5/8 wrench and removing the 2 bolts on the back of the caliper one at the top the other at the bottom. after removing these you can use a C-clamp to press the pistons back. Remember to take off all metal slide and pieces and save and clean them as shown.
*Inspect your brakes if you pads are worn this is a good time to get new ones or if the metal pieces are worn or in bad condition replace them. Your brakes are important and need to be cared for properly*
#2
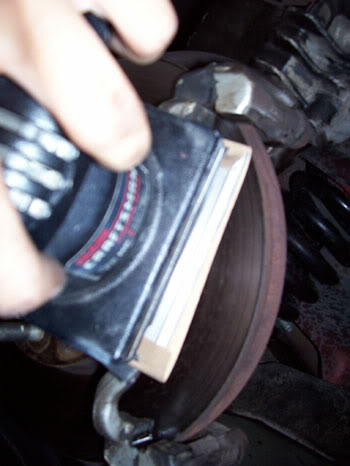
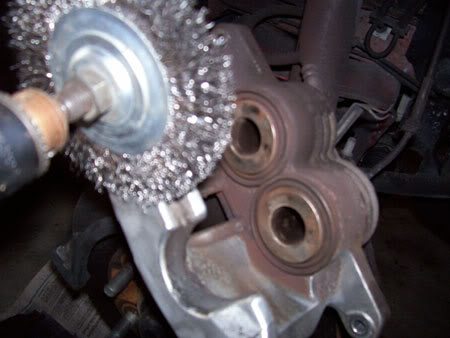
Now if you have never painted your calipers you may not have to do this. But even on tough junk you may need to use a wire brush. I found a sander was slow and ineffective. So I got a Carbon Steel Wire Brush which I hooked up to a power drill. Bwahahaha this thing took the paint off and polished the metal real nicely.
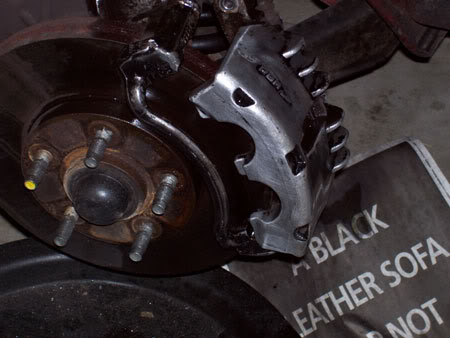
The idea is to get as much off as possible. Use the brake cleaner after all paint/dirt is off. and scrub and wipe off excess liquid.
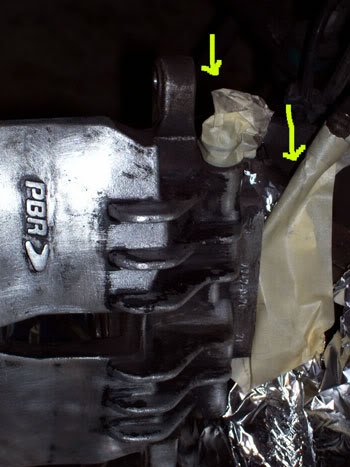
Make sure you mask off these points before painting 1.The brake bleeder nipple. 2. Part of the brake line. Also get the pistons on the underside if you plan on painting the inside as I did. Importantly remember to mask off the rotor I used foil because is bendable and I wanted to paint the cliper guard but you can just use a plastic bag and cover the whole rotor and rest the caliper on top. NEVER LET YOUR CALIPER HANG its just not cool and a good way to ruin your brake line.
#3
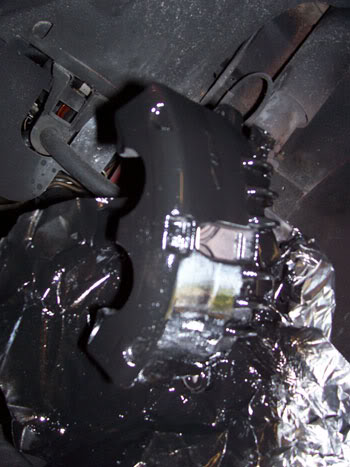
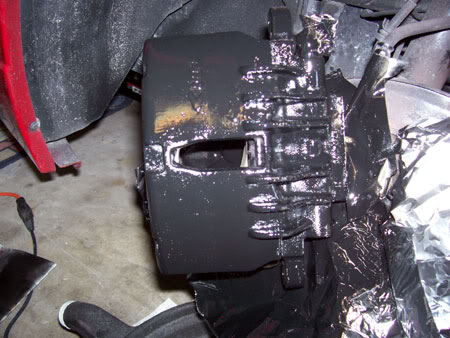
OK heres where patience comes into play. WHen painting make sure you shake the can very well. Keep the can 12-15 inches away from the caliper and from the bottom up use small pulses and keep your hand moving. If you do not it will run and will look terrible. Once covered a decent amount. Let it stand for at least 20 min. Have a cold beverage or you can start on the other caliper as I did. *Tip VHT paint cures better in 70 degrees plus so I brought out a portable heater and heater that area up a bit. You can use a heat gun or blow dryer if you want to speed up curing.* Repeat and I suggest 3-4 coats.
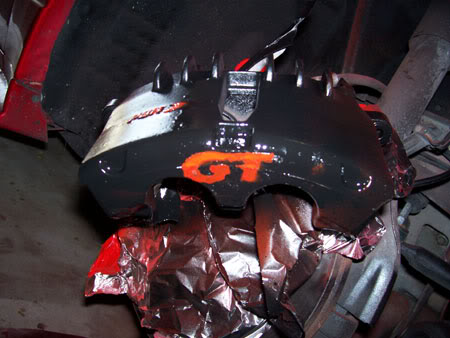
Now this was fun I made a unique GT emblem out of posterboard and used it as a stencil after the caliper dried a bit. Remember to let dry for at least a few hours after finishing painting and it wont completely cure for 24 hours but you can speed this up with heat and a dry place.*Tip: If you do not have a steady hand there is high temperature vinyl that many people precut into designs on ebay and you can just stick on the caliper. I have used this and just put a clear coat over the top after placing it on.*
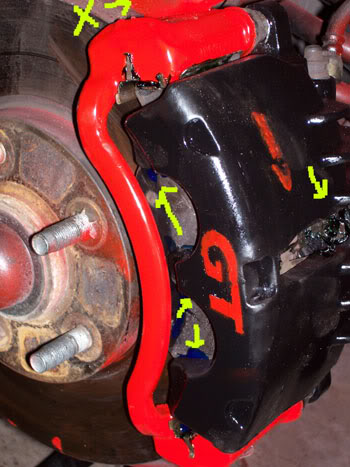
While reassembling your caliper and brake pads remember you are essentially doing a brake pad change. Remember to grease pins and metal slides with high temp grease. And use Disk Quiet on the front of the pad facing out. This will prevent any squealing from the brakes. And dont forget the two bolts in the back of the caliper. Notice my overspray in the upper corner (not cool) but can be easily taken off since its fresh paint.
#4
-Always remember to bleed your brakes after doing any kind of brake job
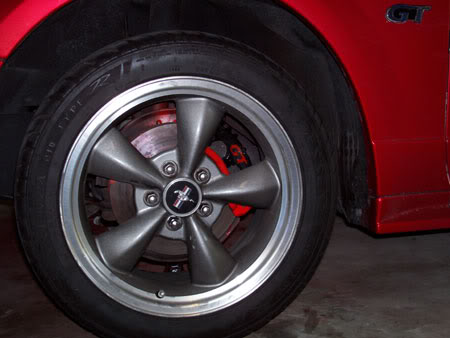
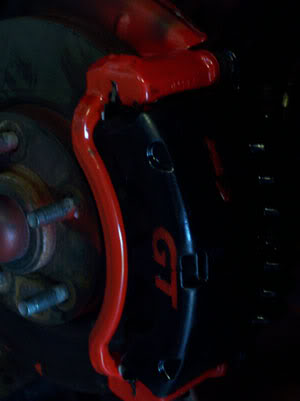
This is the final product. In my opinion this is cheap way to make your stang look better. Total cost of this project was about $25. And you will get a lot of looks at your car and makes it stand out a bit more.
Enjoy PM me if you have any questions or comments to improve this.


This is the final product. In my opinion this is cheap way to make your stang look better. Total cost of this project was about $25. And you will get a lot of looks at your car and makes it stand out a bit more.
Enjoy PM me if you have any questions or comments to improve this.
#7
Originally Posted by DaKillaKlown
Nice Post, Heres a picture of my painted calipers
#9
Originally Posted by CCM
Do you think you could get calipers powder-coated?
I think i'm going to try to learn how to powder coat if not I think I know someone who can teach me and I can use his shop.
#11
I just did my rears yesterday. It's composed of 3 pieces so the two on the outside I did red but the center I did black......Oh it looks so good complete well worth the two day effort
Thread
Thread Starter
Forum
Replies
Last Post


