Homemade Black Bullet Write Up
#1
For those who dont want to spend a ton on black bullets and tires. I have made my own set of black bullets for about $50.
Some of you know that my caliper paint I used was VHT they are doing well so I thought I would use VHT again.
Things needed:
2 Cans Aircraft paint stripper (Saves time trust me.)
2-3 Sheets 400 grit Wet/Dry sandpaper
2 Cans VHT sandable filler primer
3-4 Cans VHT Polyurethane Wheel paint (Gloss Black)
1 tarp (this will get messy)
Soap and water spray
many rags
Masking tape
Plastic covers
rubbing compound and wheel wax
And if you have metal blemishes you will want to use these...
1 Grinder wheel
1 Wire brush wheel
Power drill
WARNING PLEASE DO THIS IN A WELL VENTED AREA!!!
-First off, take your stock bullets off your car pop out the center caps and lay them down on the tarp and tape on the plastic covers on the tiresnot on the rim. Then take the wheel wax and put a thick amount over the polished part of the rim and last but not least use the masking tape and very carefully mask the polished rim pasrt as close as possble to the painted portion of the rim....this take patience and you will be doing this several times.
-Came up with a good idea while doing this take the cans of airplane stripper or heavy duty paint stripper and spray the part your painting down real good. This will eliminate the need to sand everything off and your hands will thank you. You will start to see the old paint literally crack and peel off at this point take a rag and just wipe it off....that easy...and repeat to spray and wipe untill all that crap is removed. Take some soapy water and make sure everything is nice and cleaned off.
*Sidenote for those with metal nicks and blemishes:
take the grinder wheel and work out out the blemish or nick and sdo a little of the surrounding area so its nice and even and looks like nothing had happend there. Then take the wire wheel and smooth it out completely...lokks all nice and polished in that spot now doesnt it.*
-At this point the masking tape is probably coming off so you going to have to remask and wax the polished portion again. After this we can start the priming and sanding.
-Take the primer and start evenly priming the rim it is important to get it even or it will look like crap keep your hand moving about 7-10 inches away from the rim. Also try and angle the can to the sideof the rim so you can get a nice coat on the sides as well. you only need about 3 coats of this with about 20 min in between each coat.
-After letting the primer sit for about a hour you can begin sanding this also has to be done evenly so I recommend strokes. You will be able to tell when its smooth with your hand so keep sanding till you can run your hand over the top and feel nothing but smoothness.
-Right now there is a lot of primer dust all over the place so you may want a mask. Take some soapy water pray and clean off the rims and you most likey will ned to remask and reapply wheel wax to make sure no dust falls into the new paint your about to apply. Dry and let it sit for a little while primer holds some moisture so it needs extra dry time.
-Now with everything remasked AGAIN.........you can begin painting I chose Gloss Black so there would not be a need for a clear coat also if I needed to reapply in the future....but polyurethane paint is very durable no worries.
-Paint 10-12 inches away from the rim and with nice even coats always keep your hand moving or you will get paint runs. I swear I did about 6-7 coats wit about 15 min in between each coat.
-I let this cure for 8 hours before I did anything else, take everything off so you can see your new rim....You most likely got a little overspray on accident no worrie take some paint thinner and on a Q-tip and dot it on the parts that you accidently got and just take a rag untill it comes off.
-Get some rubbing compound and polish the lip and remove all the wax that protected it from oversprat or drifting paint through the air. take a wet rag and wipe off any crap thats on the newly painted part should be nice and cured so no worries.
At this point you can put your new black bullets on your car and laugh at everyone that spent so much on theirs....lol
Click to enlarge
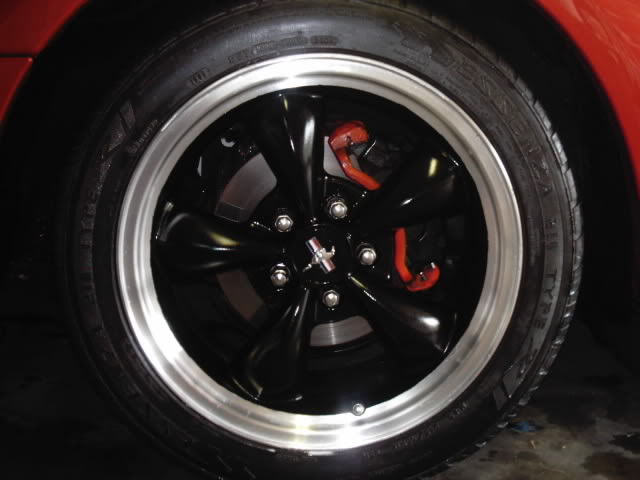
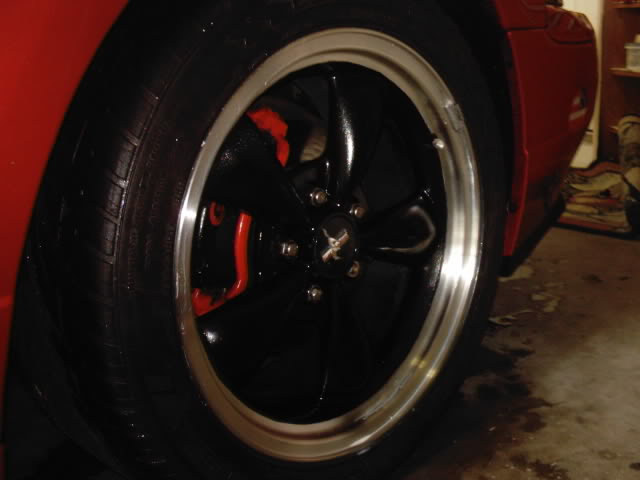
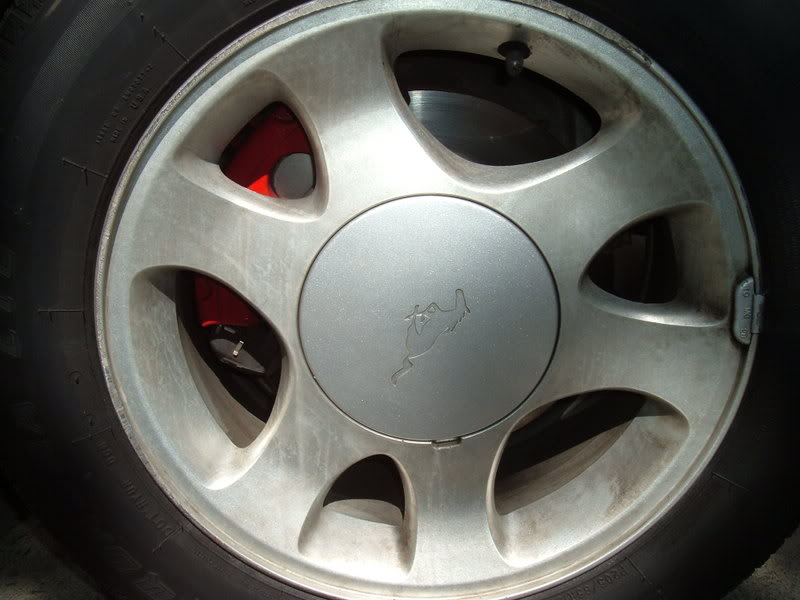
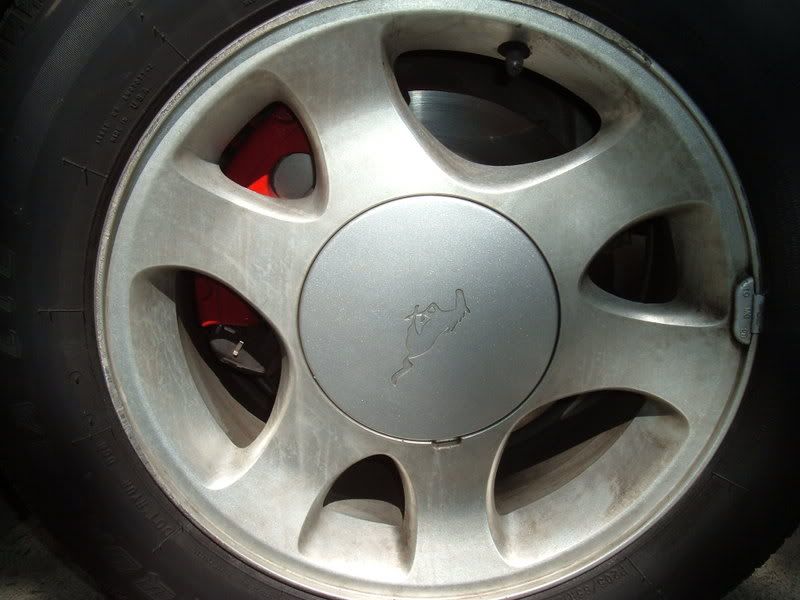
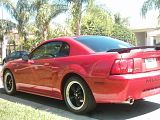
Before:
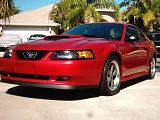
After:
Some of you know that my caliper paint I used was VHT they are doing well so I thought I would use VHT again.
Things needed:
2 Cans Aircraft paint stripper (Saves time trust me.)
2-3 Sheets 400 grit Wet/Dry sandpaper
2 Cans VHT sandable filler primer
3-4 Cans VHT Polyurethane Wheel paint (Gloss Black)
1 tarp (this will get messy)
Soap and water spray
many rags
Masking tape
Plastic covers
rubbing compound and wheel wax
And if you have metal blemishes you will want to use these...
1 Grinder wheel
1 Wire brush wheel
Power drill
WARNING PLEASE DO THIS IN A WELL VENTED AREA!!!
-First off, take your stock bullets off your car pop out the center caps and lay them down on the tarp and tape on the plastic covers on the tiresnot on the rim. Then take the wheel wax and put a thick amount over the polished part of the rim and last but not least use the masking tape and very carefully mask the polished rim pasrt as close as possble to the painted portion of the rim....this take patience and you will be doing this several times.
-Came up with a good idea while doing this take the cans of airplane stripper or heavy duty paint stripper and spray the part your painting down real good. This will eliminate the need to sand everything off and your hands will thank you. You will start to see the old paint literally crack and peel off at this point take a rag and just wipe it off....that easy...and repeat to spray and wipe untill all that crap is removed. Take some soapy water and make sure everything is nice and cleaned off.
*Sidenote for those with metal nicks and blemishes:
take the grinder wheel and work out out the blemish or nick and sdo a little of the surrounding area so its nice and even and looks like nothing had happend there. Then take the wire wheel and smooth it out completely...lokks all nice and polished in that spot now doesnt it.*
-At this point the masking tape is probably coming off so you going to have to remask and wax the polished portion again. After this we can start the priming and sanding.
-Take the primer and start evenly priming the rim it is important to get it even or it will look like crap keep your hand moving about 7-10 inches away from the rim. Also try and angle the can to the sideof the rim so you can get a nice coat on the sides as well. you only need about 3 coats of this with about 20 min in between each coat.
-After letting the primer sit for about a hour you can begin sanding this also has to be done evenly so I recommend strokes. You will be able to tell when its smooth with your hand so keep sanding till you can run your hand over the top and feel nothing but smoothness.
-Right now there is a lot of primer dust all over the place so you may want a mask. Take some soapy water pray and clean off the rims and you most likey will ned to remask and reapply wheel wax to make sure no dust falls into the new paint your about to apply. Dry and let it sit for a little while primer holds some moisture so it needs extra dry time.
-Now with everything remasked AGAIN.........you can begin painting I chose Gloss Black so there would not be a need for a clear coat also if I needed to reapply in the future....but polyurethane paint is very durable no worries.
-Paint 10-12 inches away from the rim and with nice even coats always keep your hand moving or you will get paint runs. I swear I did about 6-7 coats wit about 15 min in between each coat.
-I let this cure for 8 hours before I did anything else, take everything off so you can see your new rim....You most likely got a little overspray on accident no worrie take some paint thinner and on a Q-tip and dot it on the parts that you accidently got and just take a rag untill it comes off.
-Get some rubbing compound and polish the lip and remove all the wax that protected it from oversprat or drifting paint through the air. take a wet rag and wipe off any crap thats on the newly painted part should be nice and cured so no worries.
At this point you can put your new black bullets on your car and laugh at everyone that spent so much on theirs....lol
Click to enlarge
Before:

After:

#9
Originally Posted by MattJ
Late response but great write up. I think I might change mine just for the hell of it.
#11
wow talk about waking up a dead thread but...
there are alot of steps there for a simple process...like i am confused on why u are waxing the polished lip everytime?
i am about to help my friend do it to his and just need to clear up some confusing **** in the writeup
there are alot of steps there for a simple process...like i am confused on why u are waxing the polished lip everytime?
i am about to help my friend do it to his and just need to clear up some confusing **** in the writeup
#12
Originally Posted by TClark22
wow talk about waking up a dead thread but...
there are alot of steps there for a simple process...like i am confused on why u are waxing the polished lip everytime?
i am about to help my friend do it to his and just need to clear up some confusing **** in the writeup
there are alot of steps there for a simple process...like i am confused on why u are waxing the polished lip everytime?
i am about to help my friend do it to his and just need to clear up some confusing **** in the writeup
Just to be careful, tape wont protect everything in case I oversprayed or any paint got under the tape all you would hae to do is wipe it off instead of taking paint thinner to get it off....get it
#16
#21
great wirte up! i have just one question, would this work to make my stock 97 gt rims really shiney if i buy the right paint or is there another way to make them look really really nice?? and a shiney chrome finish?
Thread
Thread Starter
Forum
Replies
Last Post


