How to install Scott Drake Shelby Hood pins New Edge SN95 with a lanyard holder
#1
 05-30-2010, 06:40 PM

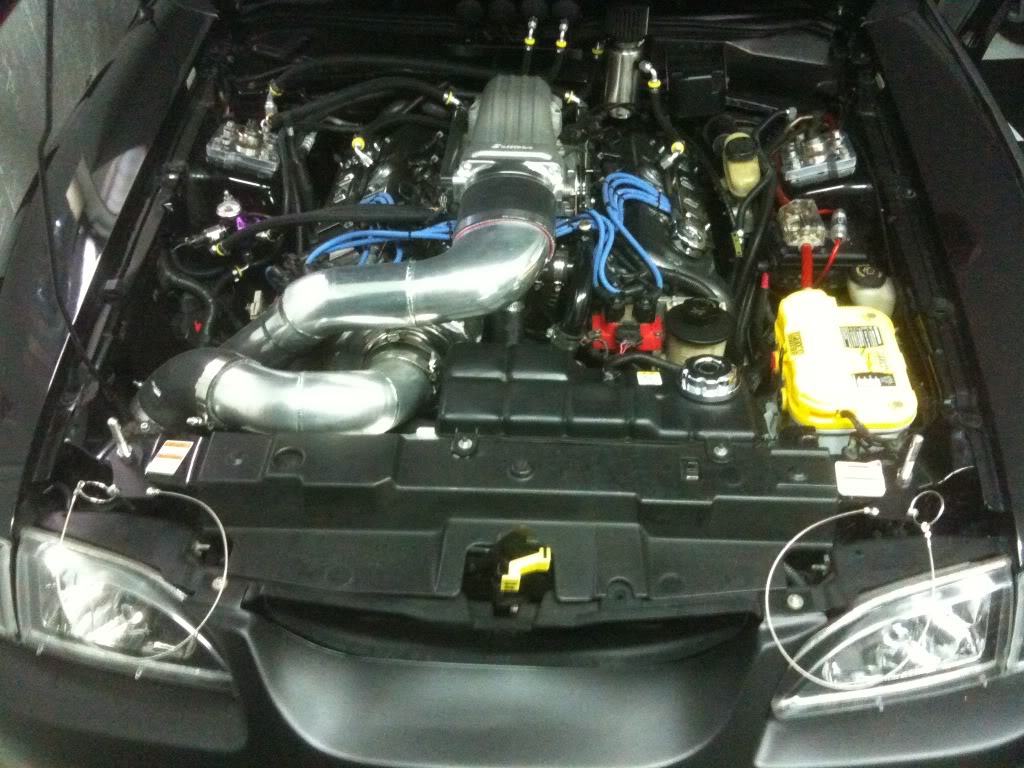
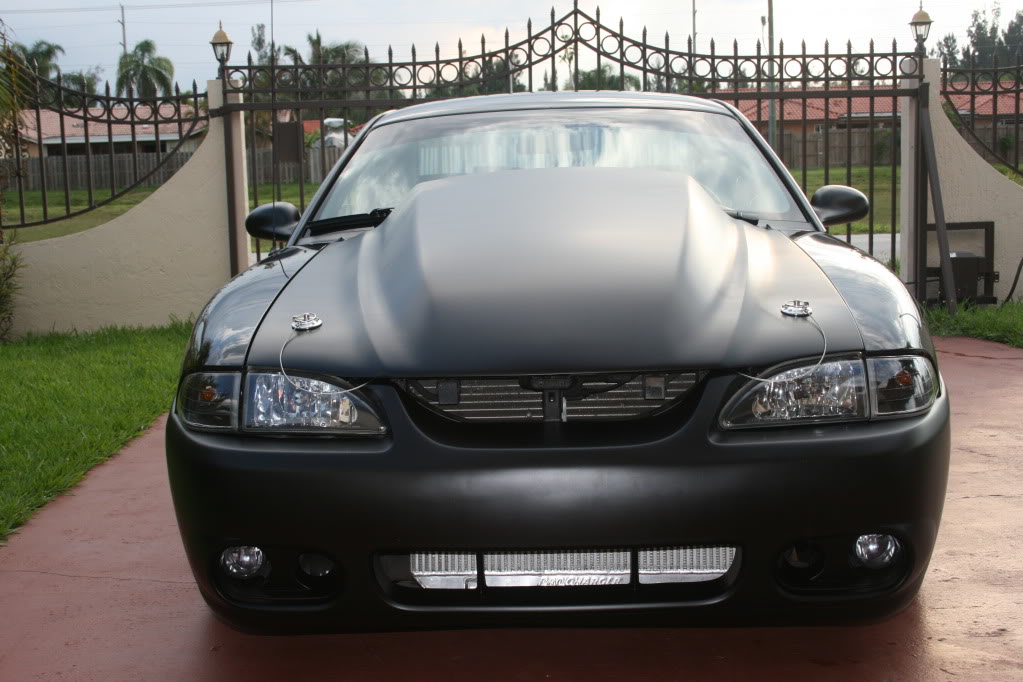
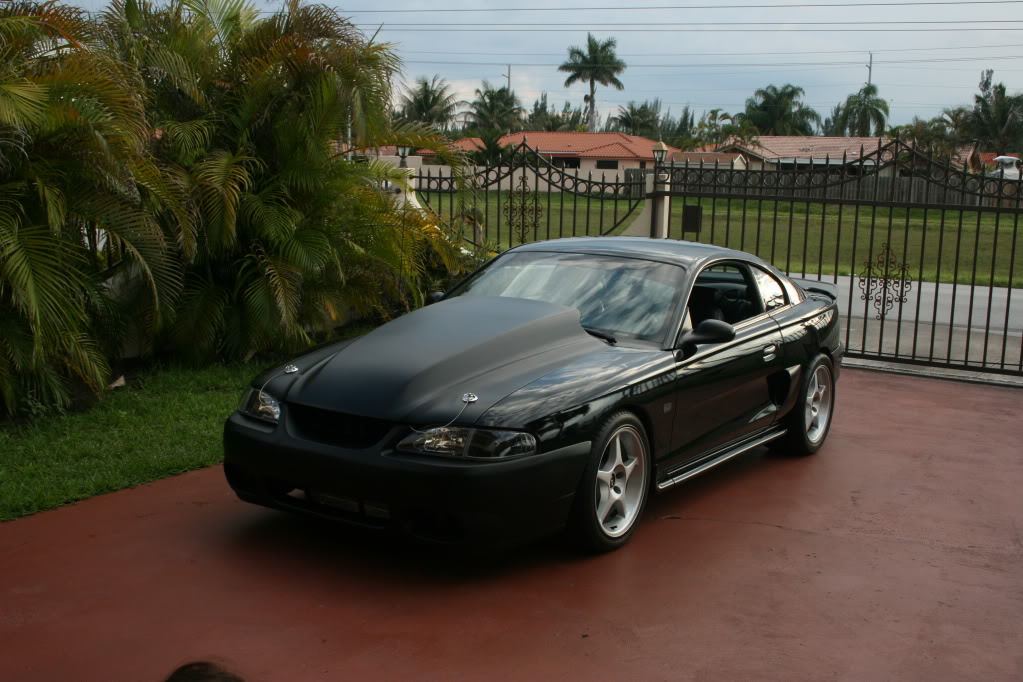
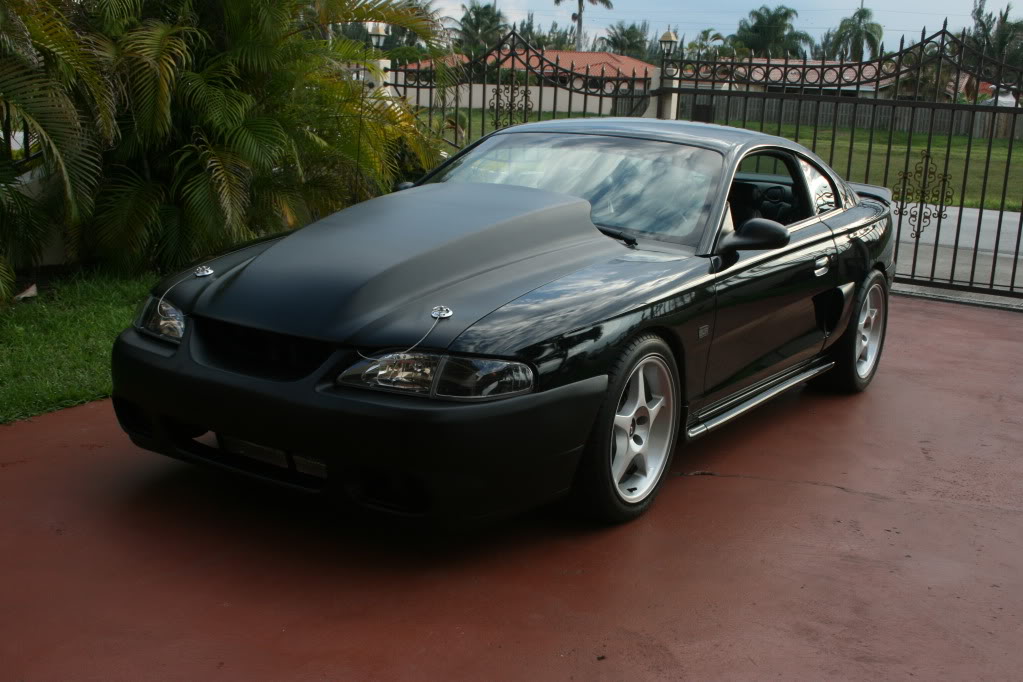
As you know these kits are made for S197 Mustangs. They come with some mounting brackets that most would find useless and throw away however they are better served as a mounting point and holder for the lanyards. I retained my hood latch for security. I undo the hood pins then open the stock latch. I have not seen this done before and think this is the first time this has been done.. Pics are taken with my iphone so sorry for fuzzy or low res pics.
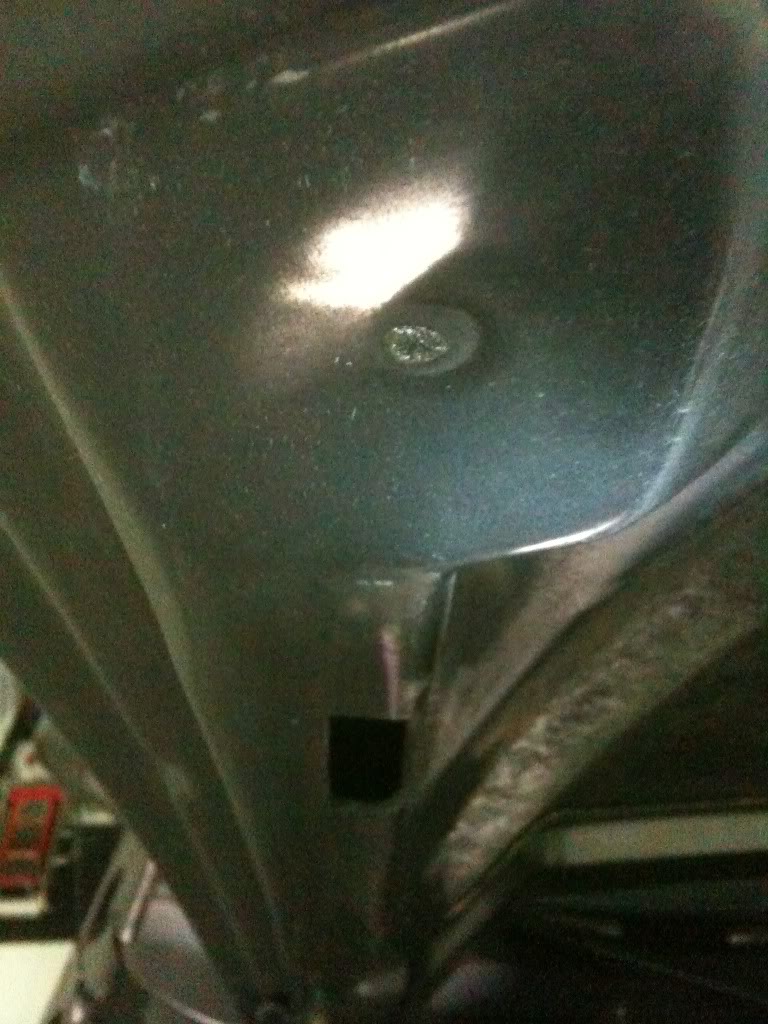
First remove your old bump stops and cut open the hole big enough to drop the nuts of
the pin kit, you dont want the holes to be too big as the bottom nut needs to have something to press against, you also want to apply some touch up paint to to avoid rust, you dont have to make it look pretty as you will not see it. (I need to add some grease to that prop rod lol)
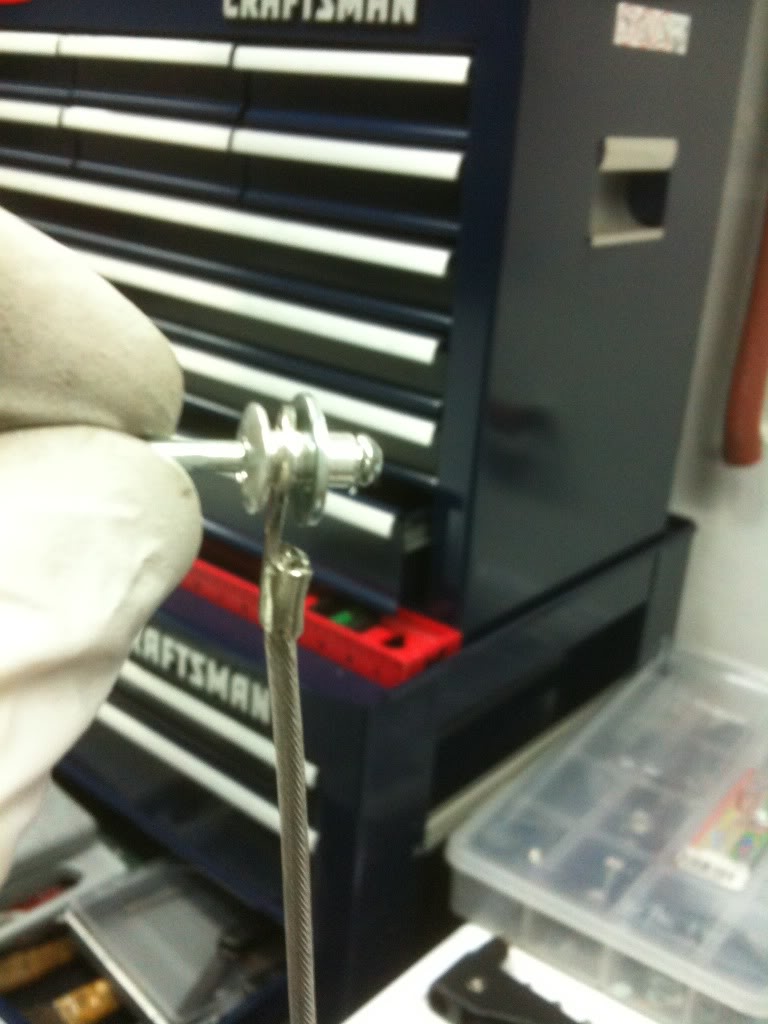
Screw in the other nut on the pin, place the pin throw the mounting plate as shown below, there is a hole right below the the nut you dropped earlier, place your finger under the dropped nut and thread the pin on to it
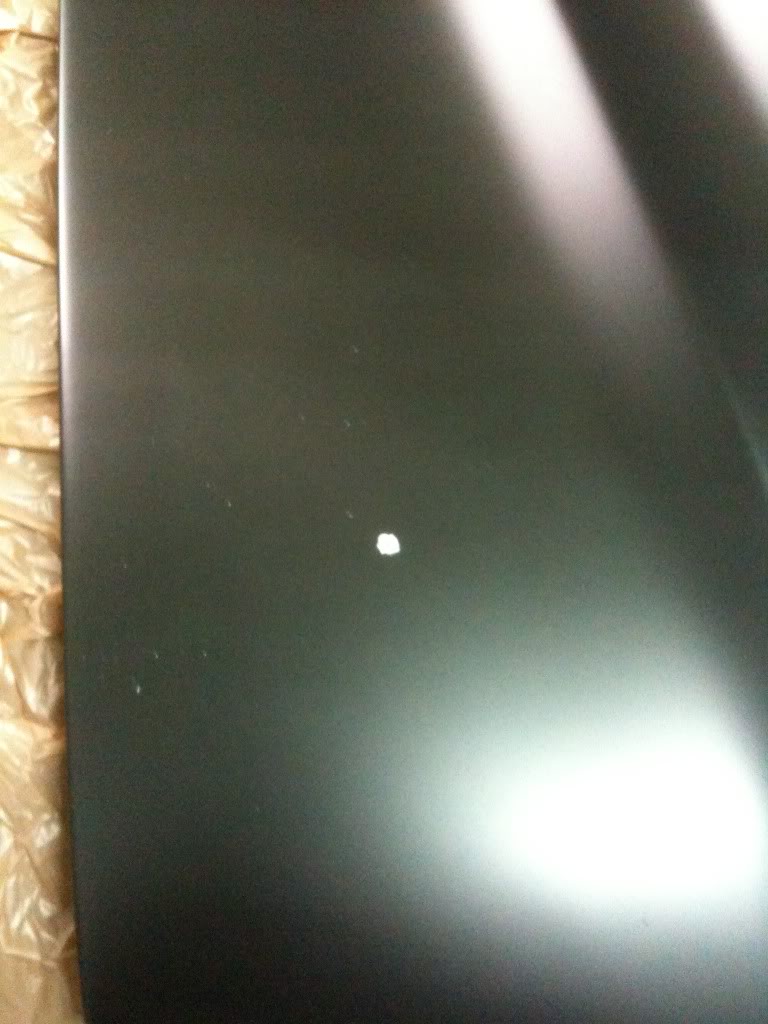
Dab some grease on the pin to mark the hood, you can move the pins around and you should try to center it on the bump stop rest on the hood
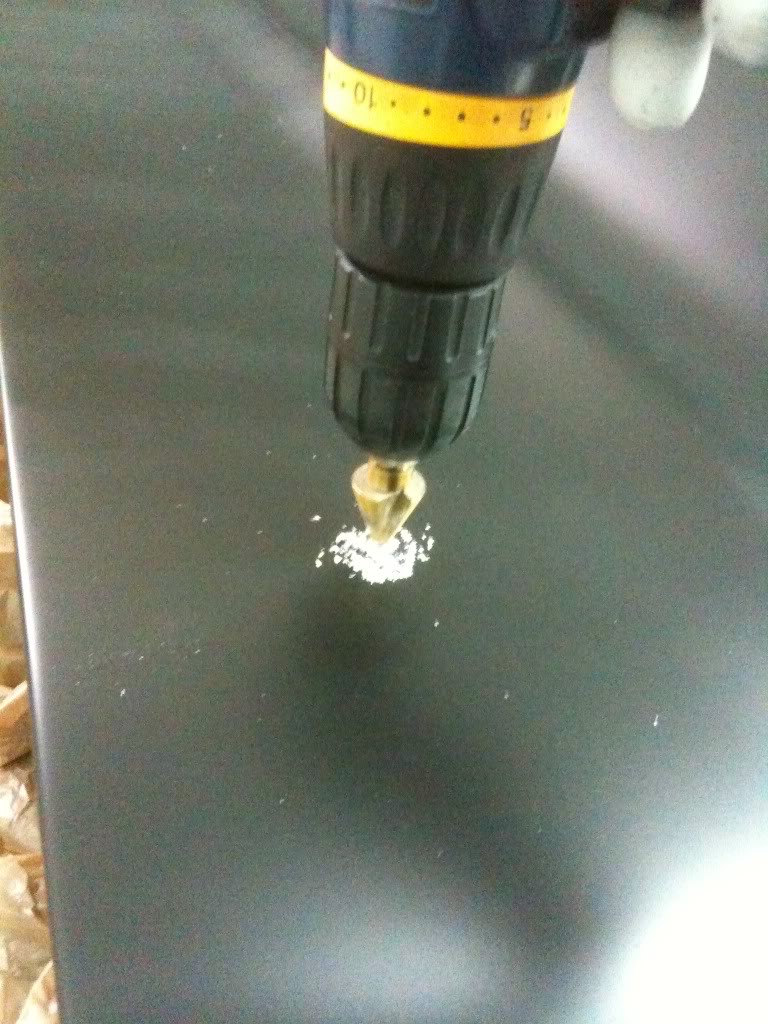
Drill a small hole then use a step drive to enlarge the hole, since its fiberglass or CF no need to get an expensive step drill bit but make sure the bit is not to long as you do not want it going through both layers of the hood
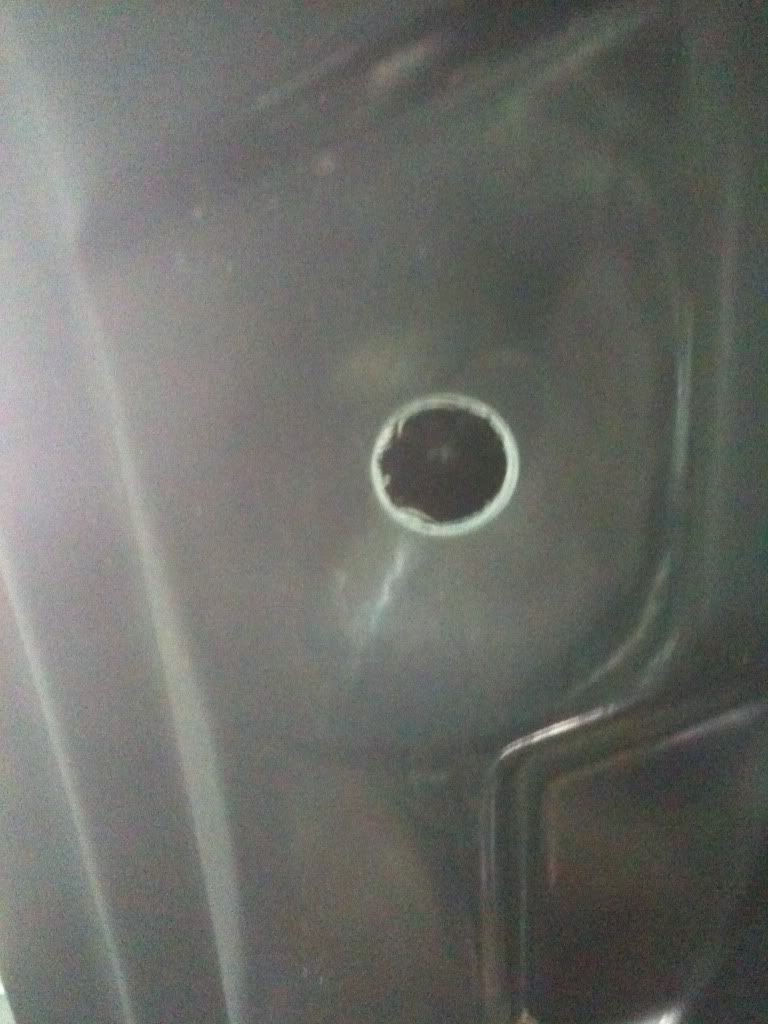
(You should use some painters tape up top to minimize chipping, since I have flat paint I had no need) Dab some more grease and mark the outer hood, drill with a small drill bit

First remove your old bump stops and cut open the hole big enough to drop the nuts of
the pin kit, you dont want the holes to be too big as the bottom nut needs to have something to press against, you also want to apply some touch up paint to to avoid rust, you dont have to make it look pretty as you will not see it. (I need to add some grease to that prop rod lol)
Screw in the other nut on the pin, place the pin throw the mounting plate as shown below, there is a hole right below the the nut you dropped earlier, place your finger under the dropped nut and thread the pin on to it
Dab some grease on the pin to mark the hood, you can move the pins around and you should try to center it on the bump stop rest on the hood
Drill a small hole then use a step drive to enlarge the hole, since its fiberglass or CF no need to get an expensive step drill bit but make sure the bit is not to long as you do not want it going through both layers of the hood
(You should use some painters tape up top to minimize chipping, since I have flat paint I had no need) Dab some more grease and mark the outer hood, drill with a small drill bit
Last edited by venom; 06-02-2010 at 08:00 PM.
#2
05-30-2010, 06:40 PM
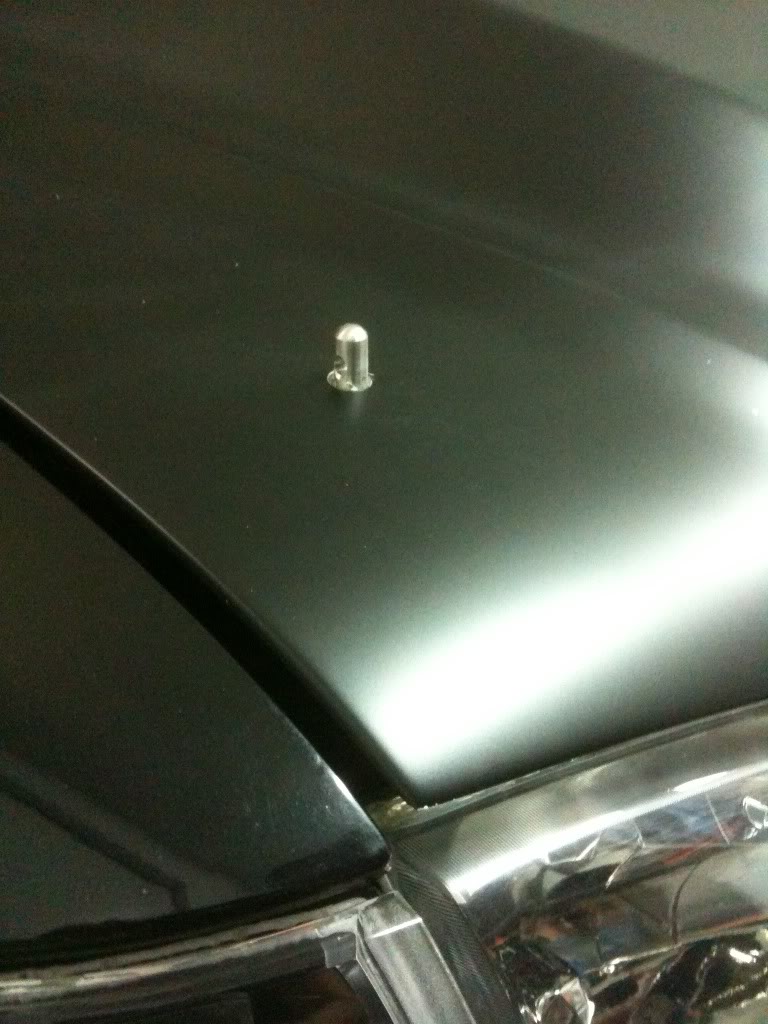
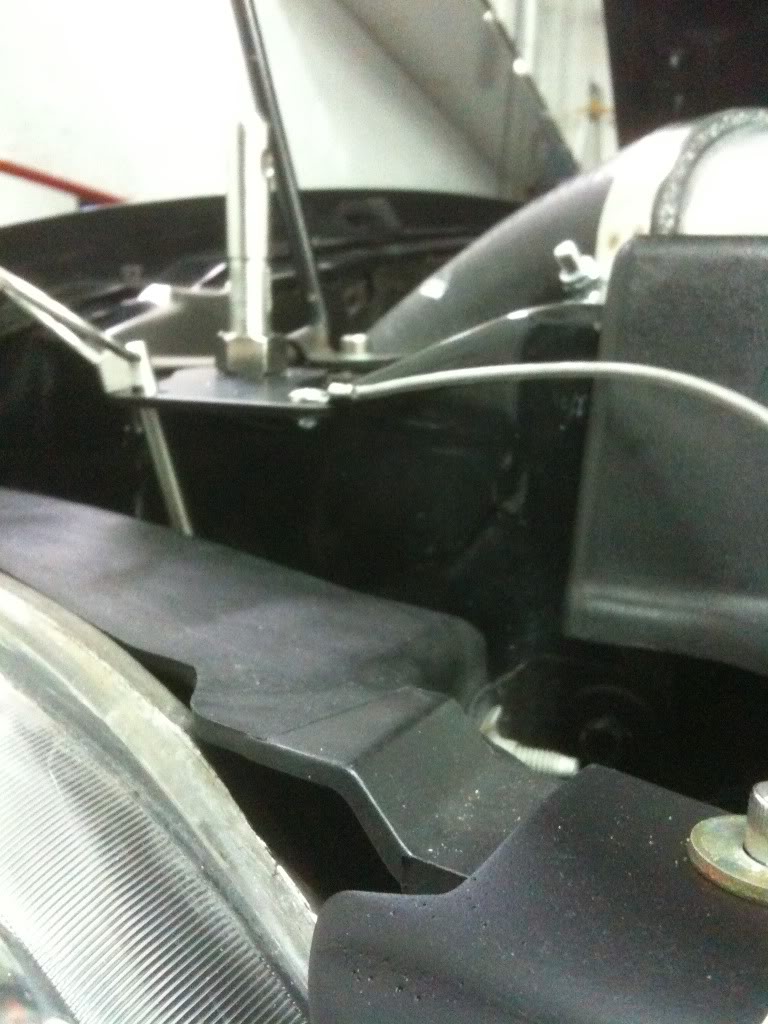
Now you should see the hole on the top of the hood, at this point I made the hole a bit bigger and checked to make sure the pin lined up, then I enlarged hole big enough for the pin to go through but dont over do it
Step drill bit
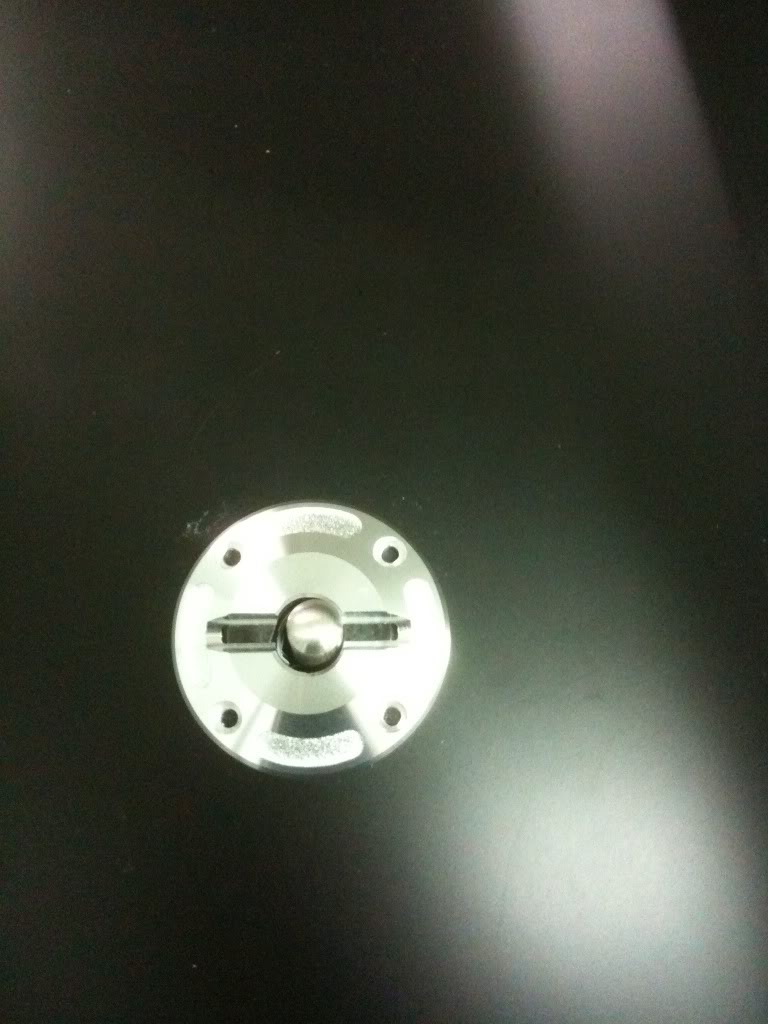
Place the plastic gasket and billet hat on the hood and adjust pin to correct height making sure you insert the pin to double check as if you have pin too high pin will rattle and if its too low pin will not fit NOTE: if you are having troubles raising and lowering pin as there is no way to get to bottom nut all you have to do is loosen the top nut, tilt the pin and with 1 of your fingers hold the bottom nut and spin the pin, clockwise is lowering and counter CW is rasing
Step drill bit
Place the plastic gasket and billet hat on the hood and adjust pin to correct height making sure you insert the pin to double check as if you have pin too high pin will rattle and if its too low pin will not fit NOTE: if you are having troubles raising and lowering pin as there is no way to get to bottom nut all you have to do is loosen the top nut, tilt the pin and with 1 of your fingers hold the bottom nut and spin the pin, clockwise is lowering and counter CW is rasing
#3
05-30-2010, 06:41 PM
Once everything is lined up and pins fit snug, drill the holes for the screws, in this step I use a small drill bit to make pilot holes just make sure not to damage the billet hat, if you are the carless type and you have tape on you hood you can just get a nail and mark the holes with that or a fine marker would work as well, once marked remove the gasket and hat and drill the holes since I did not check the drill bit size all I did was line up the screw with a drill bit and made sure it was thinner than the screw, if you go too thick the screw will not have enough meat to bite in if its too thin the screw will crack the fiberglass or CF, you can do some test holes on a scrap piece of wood to see what hole is the best, it is better to go to small as you can always enlarge
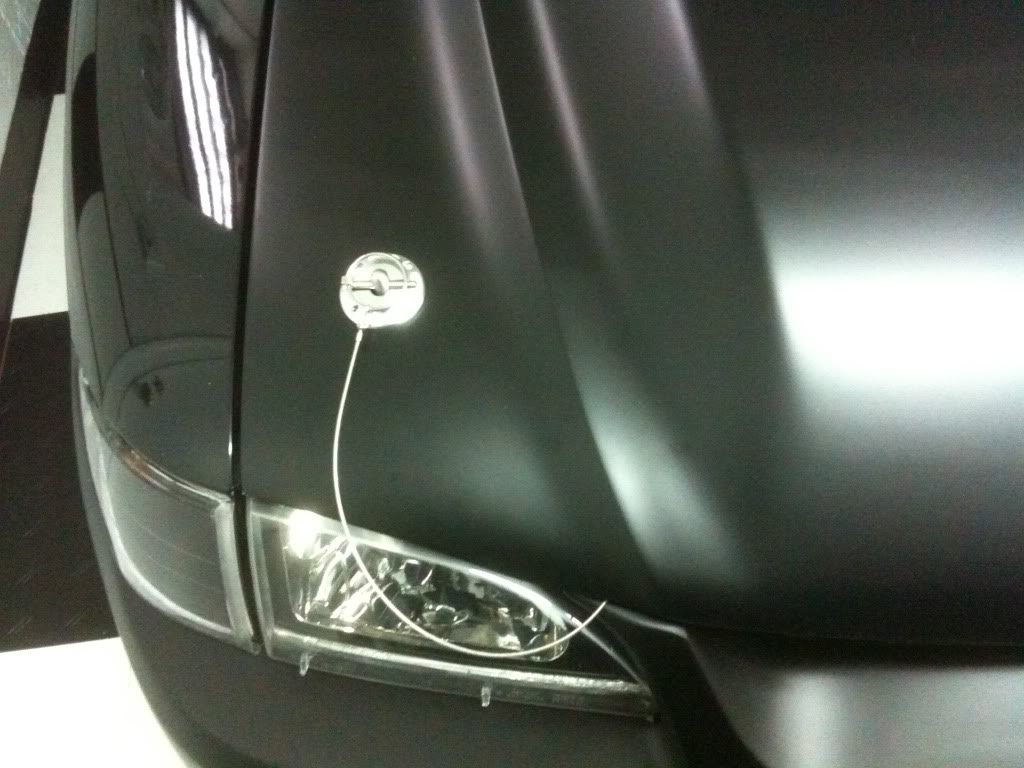
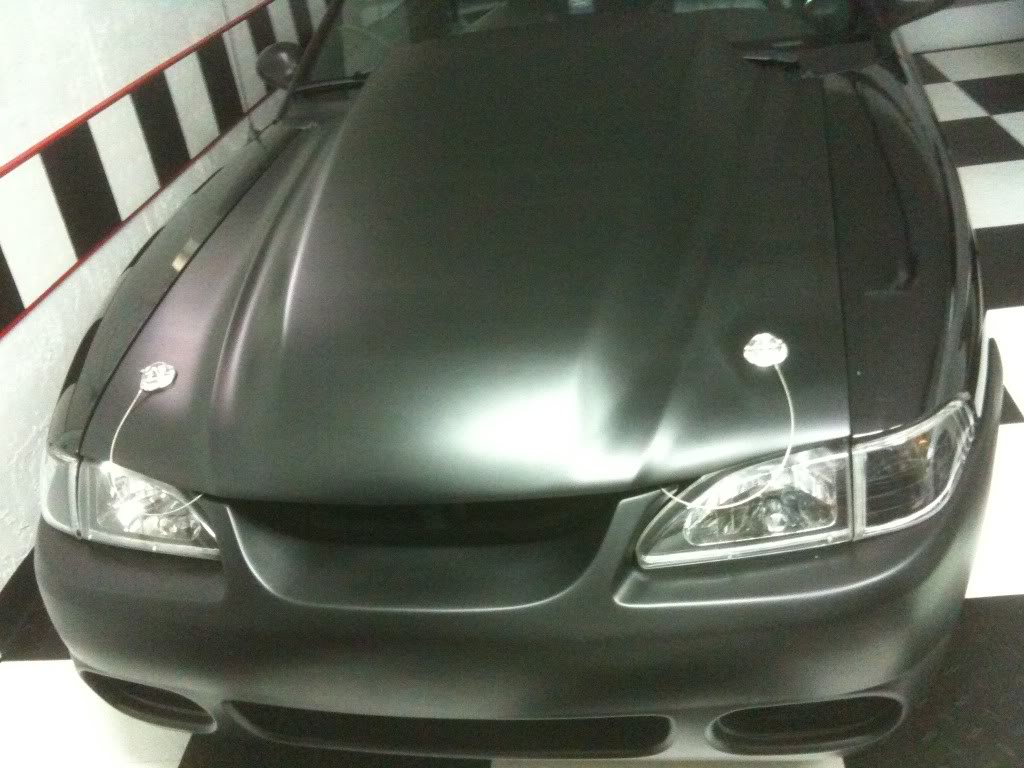
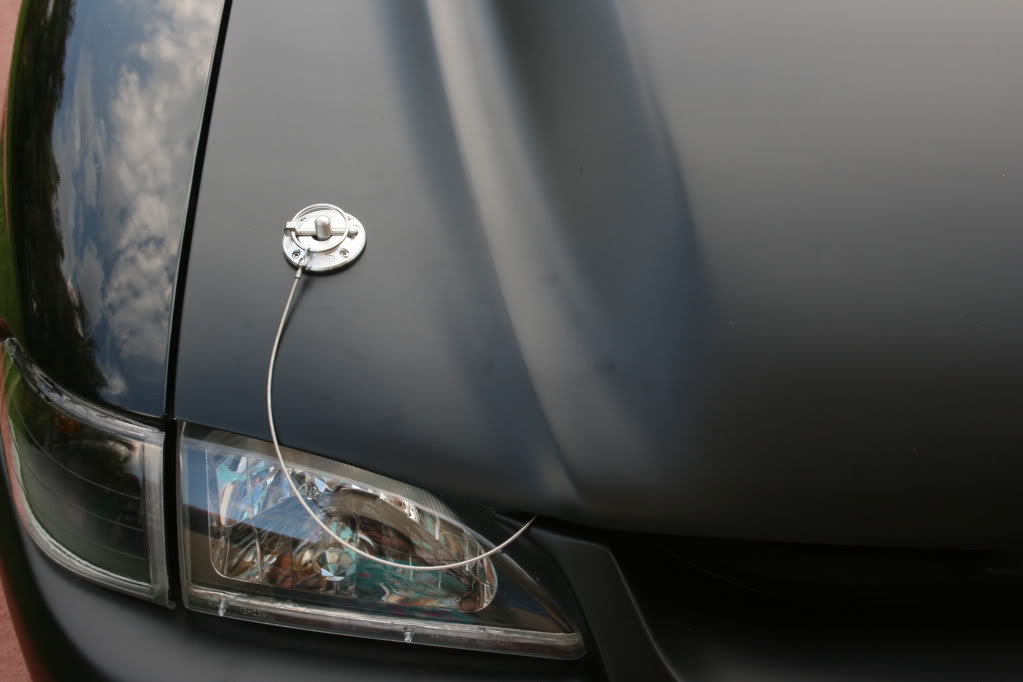
How to mount the lanyards, grab a washer and rivet, you will be placing the washer under the mount and the lanyard on top with the rivet passing through lanyard, mount then washer, once done you will have the other hole as a pin holder, I closed the hood with the pins on the mount and it did not make contact with the hood
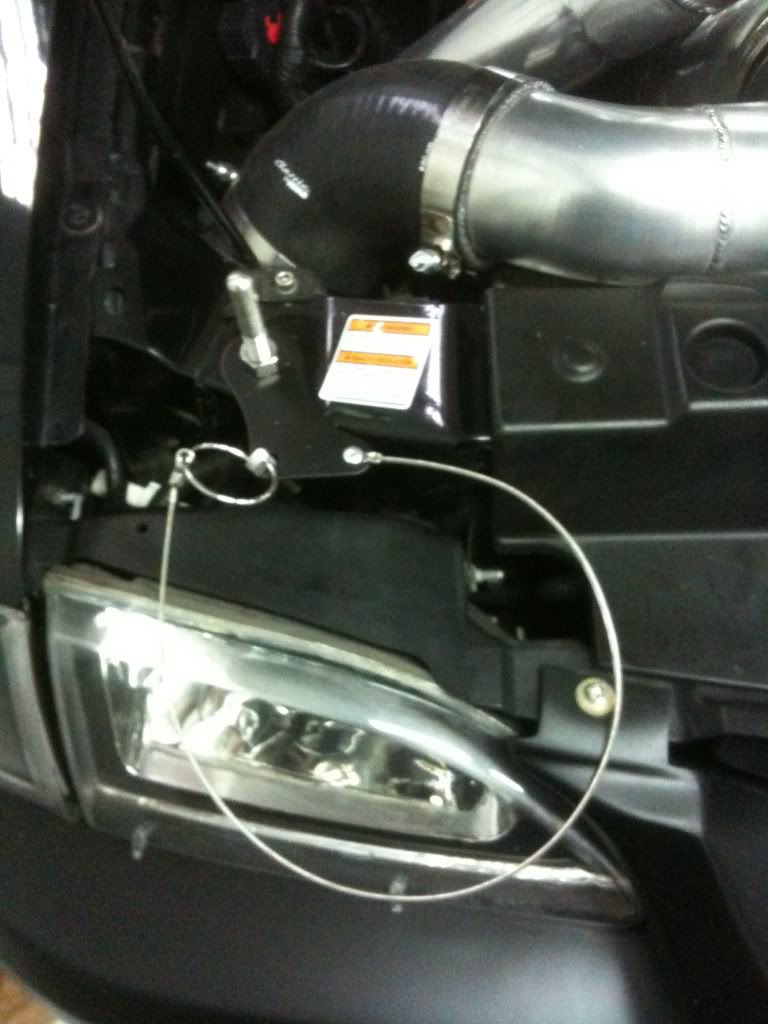
How to mount the lanyards, grab a washer and rivet, you will be placing the washer under the mount and the lanyard on top with the rivet passing through lanyard, mount then washer, once done you will have the other hole as a pin holder, I closed the hood with the pins on the mount and it did not make contact with the hood

#5
05-30-2010, 07:12 PM

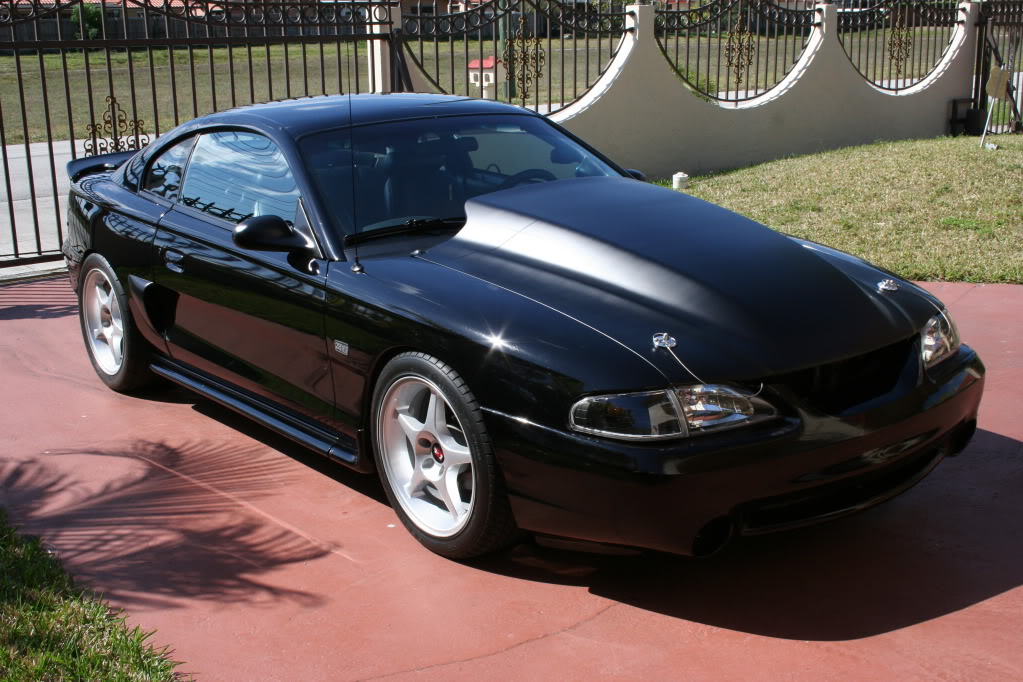
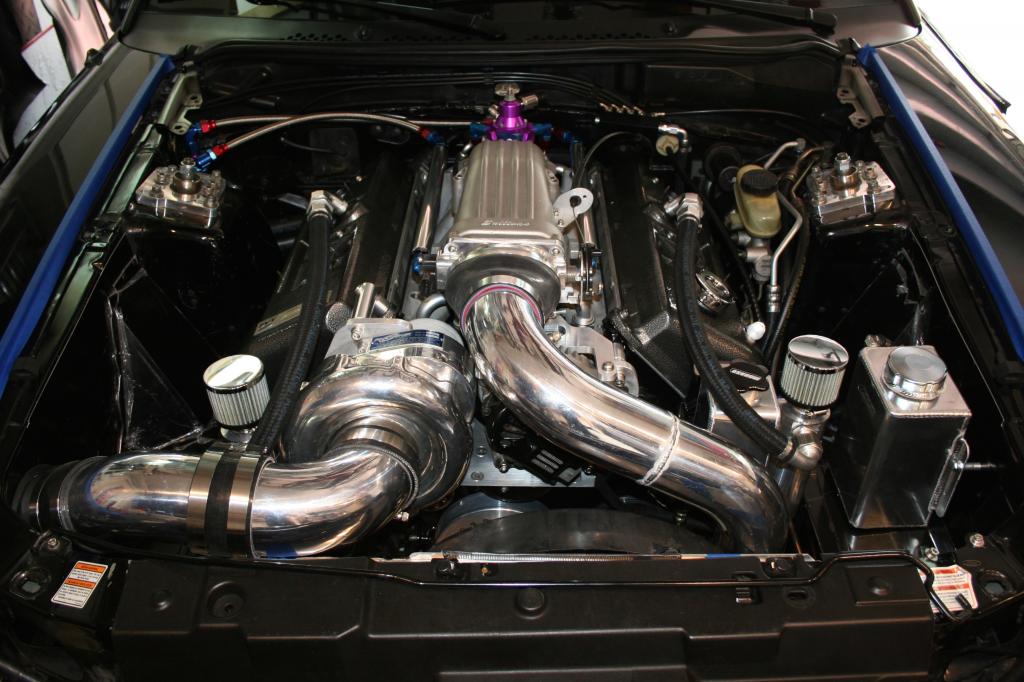
Nice, looks like the final product turned out very nicely. I gotta ask, what specifically is in that engine bay? And how come you went with a flat black bumper and hood and not the rest of the car?
#6
05-30-2010, 08:02 PM
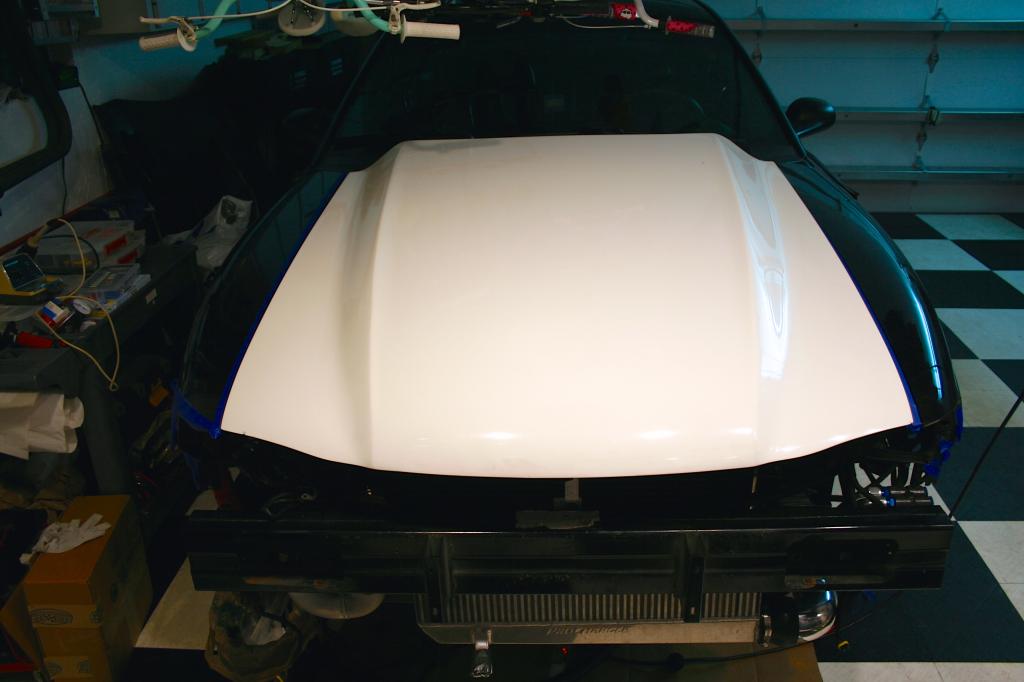
Flat black is just temporary as I got tired of driving around with a blue bumper and white hood. Until I am 100% done with all major work I will not paint it.
Under the hood is a Built Cobra 4v with MMR stage 3 heads and D1 proC.
Under the hood is a Built Cobra 4v with MMR stage 3 heads and D1 proC.
#7
05-30-2010, 10:57 PM
Maybe it's just me, but it doesn't look like that bumper lines up right. It might be something else, but something seems off to me. Could be nothing though lol
#8
05-31-2010, 06:19 AM
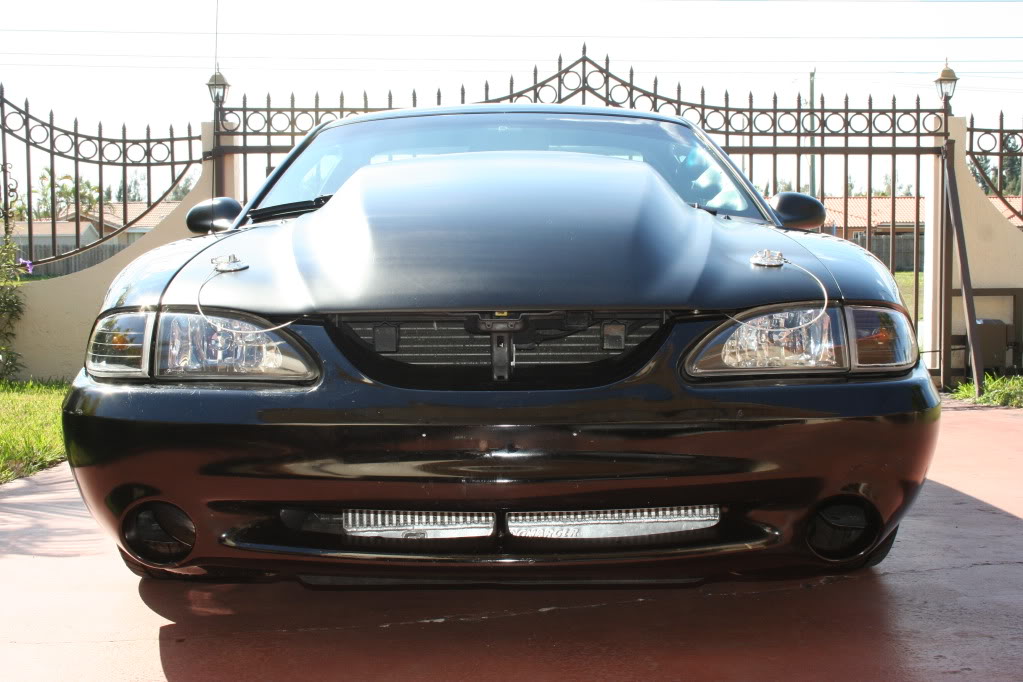
The sides of these bumpers are wider than stock plus with the two different finishes makes it stand out more. Small price to pay for better airflow of the IC. However I have been looking at getting an OE 98 Cobra bumper as I would like to lower it 1 in more in the front. The current bumper sits low and If I lower it any more I will have many issues around this area. With the sn95 cobra bumper it sits higher and I should be able to lower the front and have the same clearance but at a cost of reduced airflow to IC. If I can score a bumper locally I will give it a try and see the pros and cons.
#9
05-31-2010, 07:25 AM

This looks bad *** already so I can only imagine how good it will look when you're really done with it.... Hood pins look great... Can't wait to get my cowl hood with hood pins
#10
05-31-2010, 07:29 AM

Fantastic job!
That's how I like to do things, clean and nice. I love that hood too, looks mean as ****. Though I could not DD a car with a hood that big. Mine is a little bit smaller cowl lol.
I hope we can get your *** up here one time for a meet and some good pics. Maybe a race or two
That's how I like to do things, clean and nice. I love that hood too, looks mean as ****. Though I could not DD a car with a hood that big. Mine is a little bit smaller cowl lol.
I hope we can get your *** up here one time for a meet and some good pics. Maybe a race or two
#11
05-31-2010, 08:26 AM
Fantastic job!
That's how I like to do things, clean and nice. I love that hood too, looks mean as ****. Though I could not DD a car with a hood that big. Mine is a little bit smaller cowl lol.
I hope we can get your *** up here one time for a meet and some good pics. Maybe a race or two
That's how I like to do things, clean and nice. I love that hood too, looks mean as ****. Though I could not DD a car with a hood that big. Mine is a little bit smaller cowl lol.
I hope we can get your *** up here one time for a meet and some good pics. Maybe a race or two
#12
06-07-2010, 09:04 PM

Those are some great looking pins! Nice work.
Let me know if you're going to get rid of the cobra bumper.. I may know someone who is interested...") Got hit with a chunk of steel belted radial this weekend.
Got hit with a chunk of steel belted radial this weekend. 
Let me know if you're going to get rid of the cobra bumper.. I may know someone who is interested...
Got hit with a chunk of steel belted radial this weekend.

#14
01-04-2015, 07:31 PM
The cowl hood is from Kaenen. It was a custom order. I sold it a few months ago and got a single rise 3" since I no longer needed the clearance.

Thread
Thread Starter
Forum
Replies
Last Post
Steve@CJPP
Sponsors
0
11-26-2012 01:10 PM

