Raptor Shift Light Installation Write Up
#1
 12-01-2006, 02:34 AM


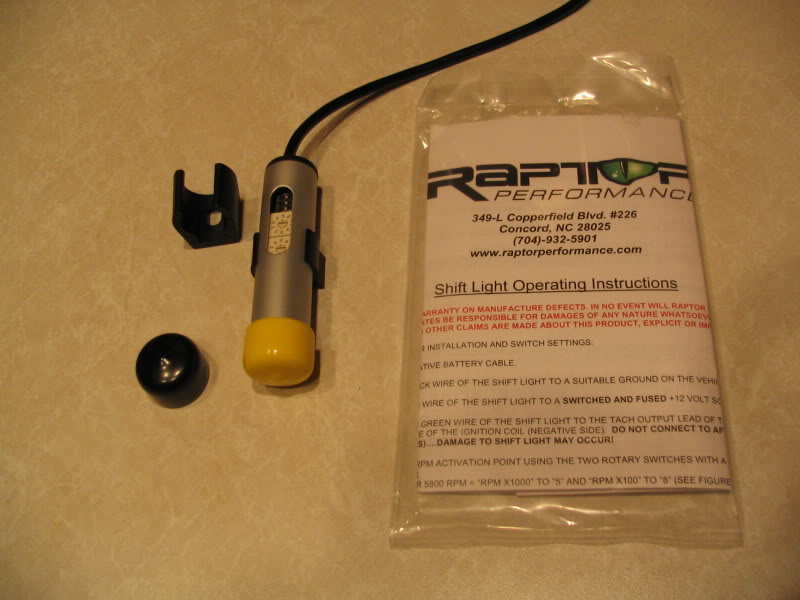
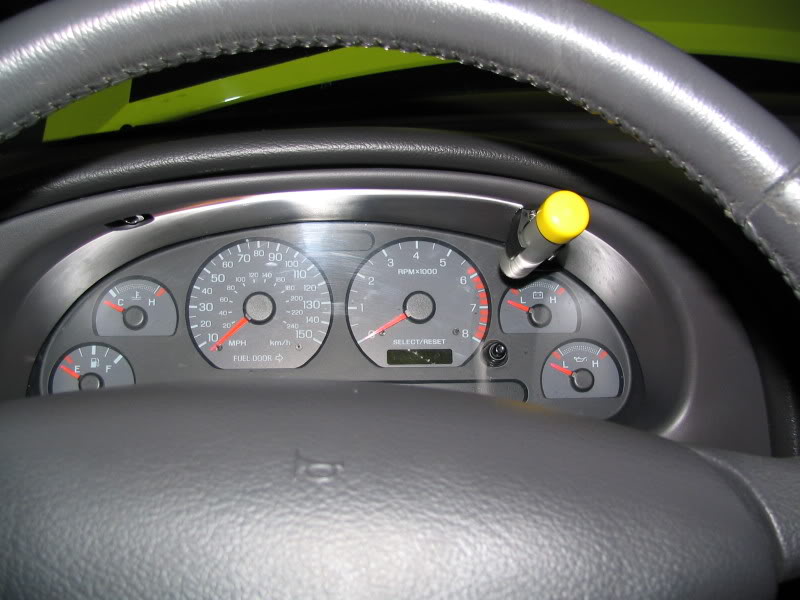
Here is my new Raptor Shift Light, all ready to be installed.
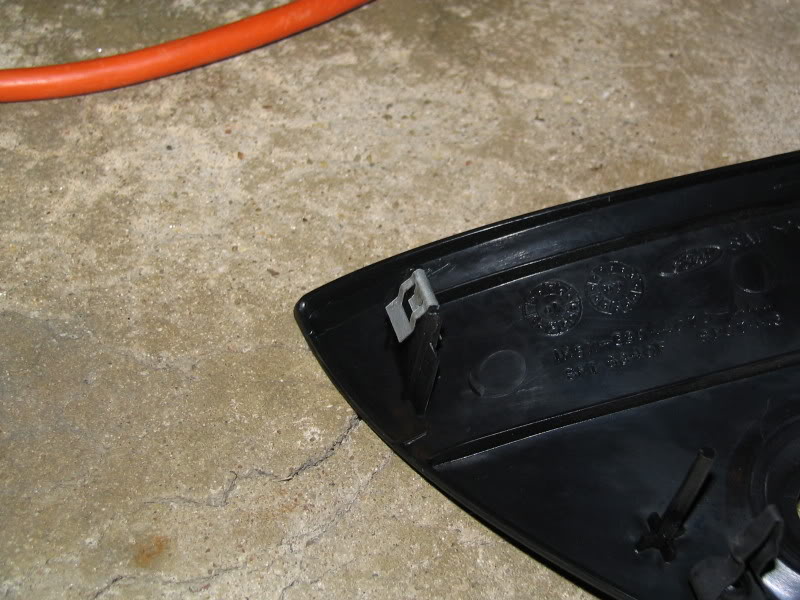
I decided to mount the light in the gauge cluster so I began by removing the outer trim piece. MAKE SURE TO UNPLUG YOUR BATTERY. NOT DOING SO COULD DAMAGE YOUR COMPUTERUnscrew the two screws and then take off the light ****. This is done by turning the **** all the way to the left and then inserting a small screwdriver and pushing up on the spring. Hold the spring like device up and pull. It should come right off.
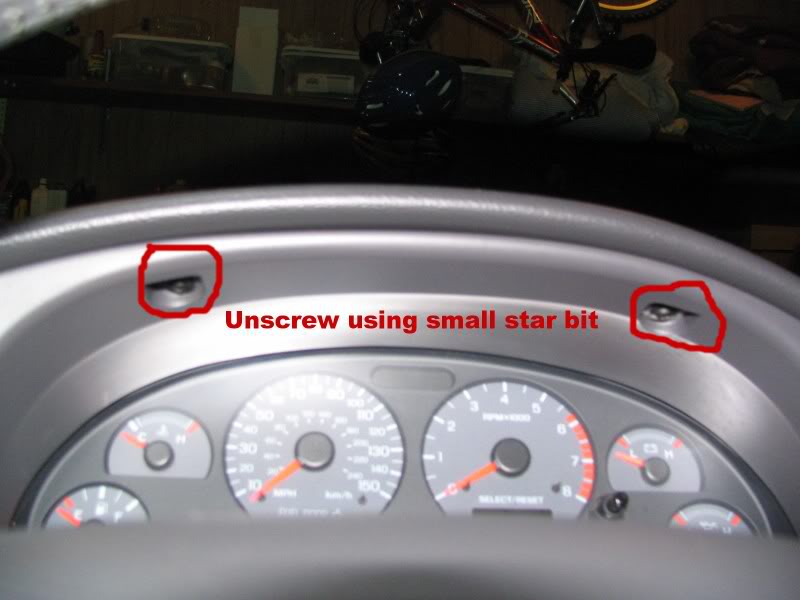
I decided to mount the light in the gauge cluster so I began by removing the outer trim piece. MAKE SURE TO UNPLUG YOUR BATTERY. NOT DOING SO COULD DAMAGE YOUR COMPUTERUnscrew the two screws and then take off the light ****. This is done by turning the **** all the way to the left and then inserting a small screwdriver and pushing up on the spring. Hold the spring like device up and pull. It should come right off.
#2
12-01-2006, 02:35 AM
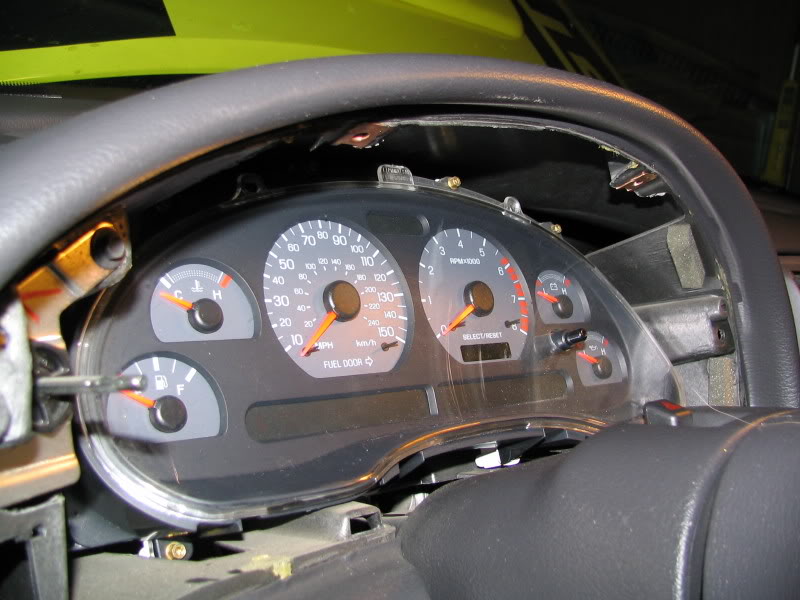
When you take the trip piece off, there are some clips that can be a bit tough to pull out. Always pull straight back and have patience. You don�t want to break them or the plastic.
#3
12-01-2006, 02:36 AM
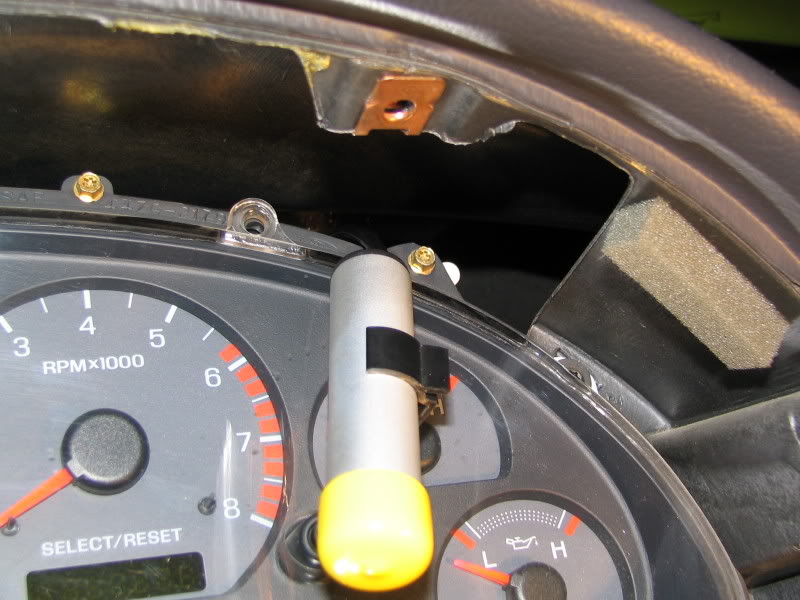
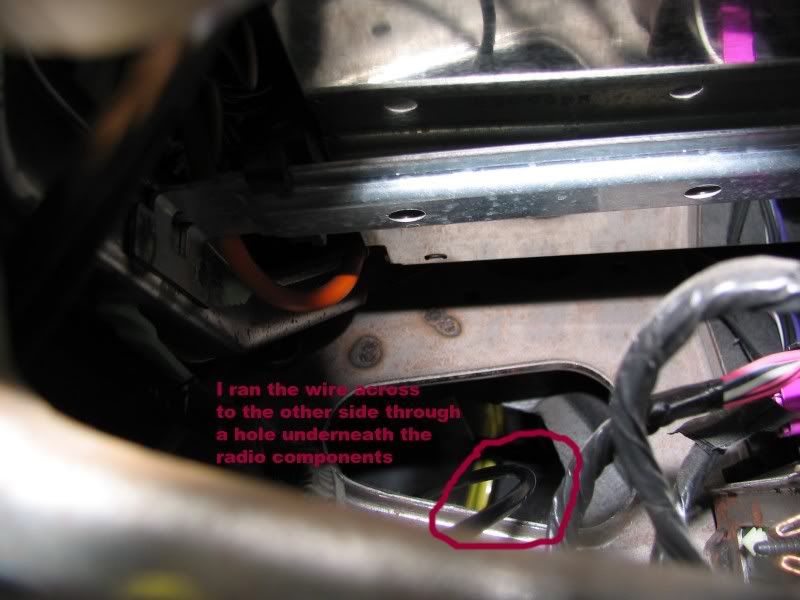
I ran the wire down the back of the gauge cluster and across under a tunnel underneath the stereo.
#4
12-01-2006, 02:37 AM
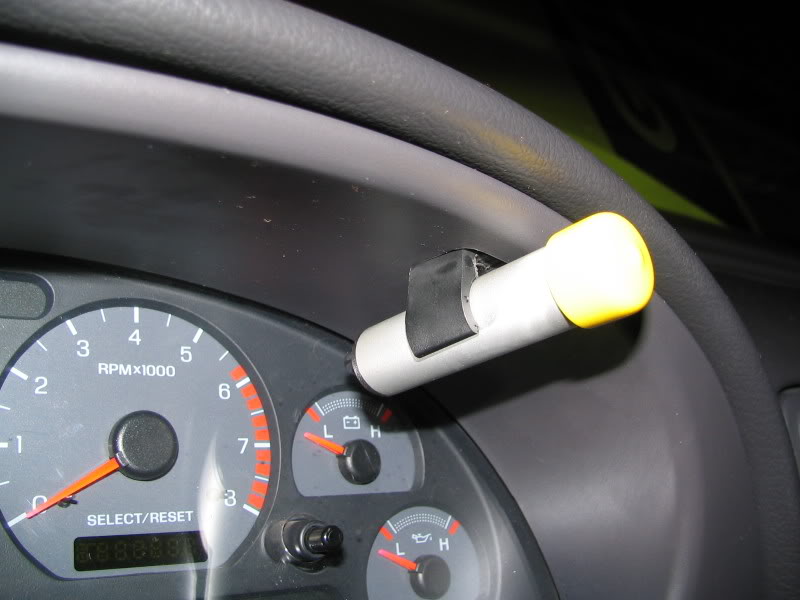
Mounted
Move over to the passenger side kick panel and remove the dome shaped push pin. The scuffed looking parts on the plastic are not scuff marks, only dirt. I used some garden tool my mom had in the garage to pry the pin out. Be careful, it is in there tight!
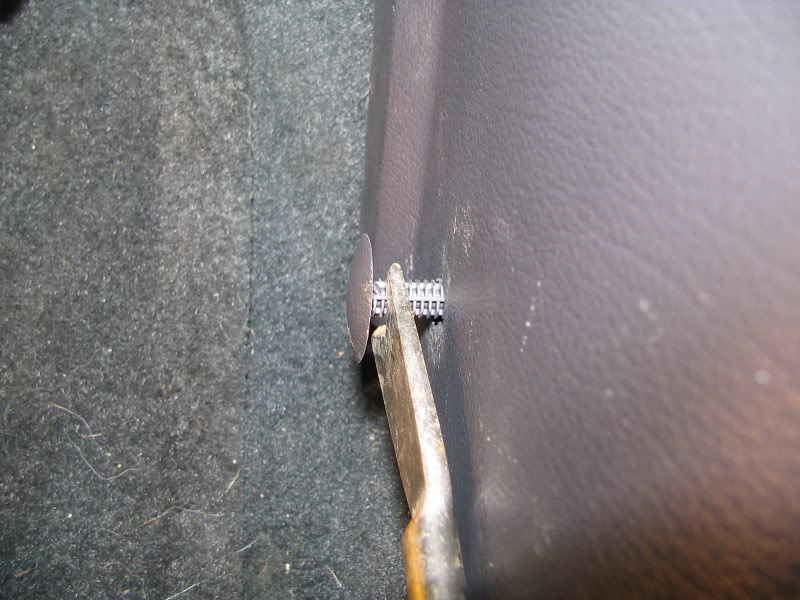
In order to remove the kick panel, you will need to remove the door jam panel. It is kind of tough to remove because of these clips, but just pull straight up and they will come off with a pop.
Move over to the passenger side kick panel and remove the dome shaped push pin. The scuffed looking parts on the plastic are not scuff marks, only dirt. I used some garden tool my mom had in the garage to pry the pin out. Be careful, it is in there tight!
In order to remove the kick panel, you will need to remove the door jam panel. It is kind of tough to remove because of these clips, but just pull straight up and they will come off with a pop.
#5
12-01-2006, 02:39 AM
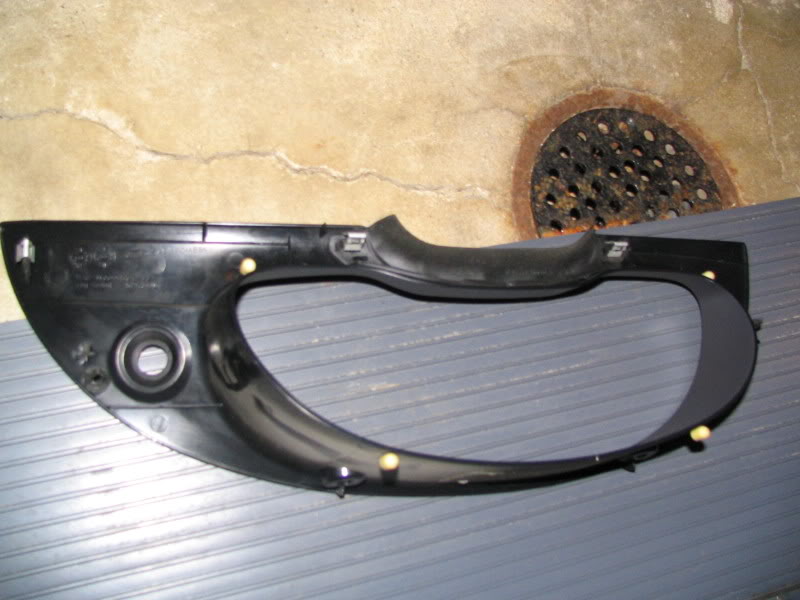
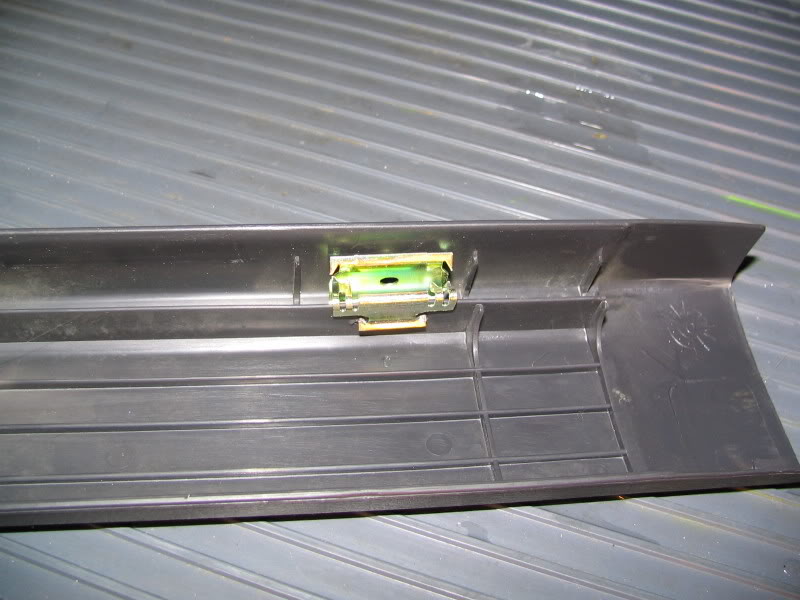
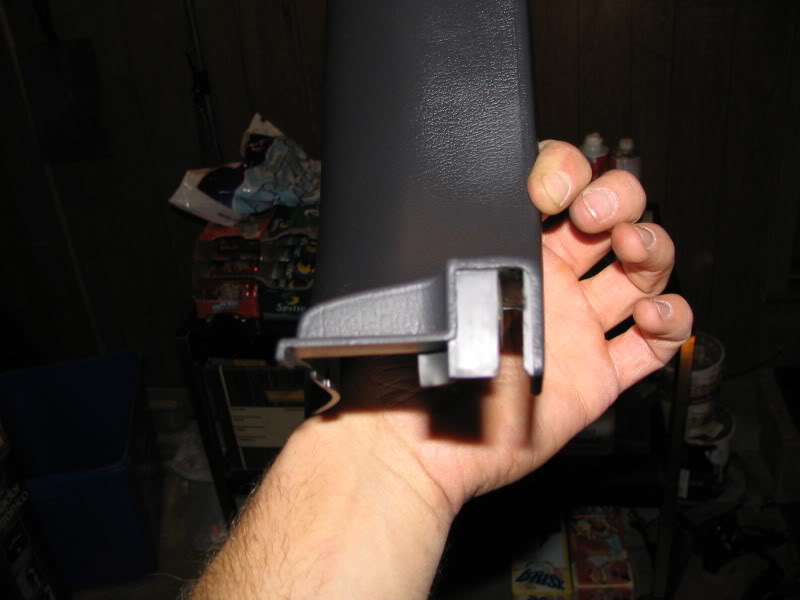
Careful when removing this piece, it has clips too. It takes some finagling to pull it out, but be patient.
Underneath the kick panel loosen the two circled bolts (7mm) to gain access to the PCM.

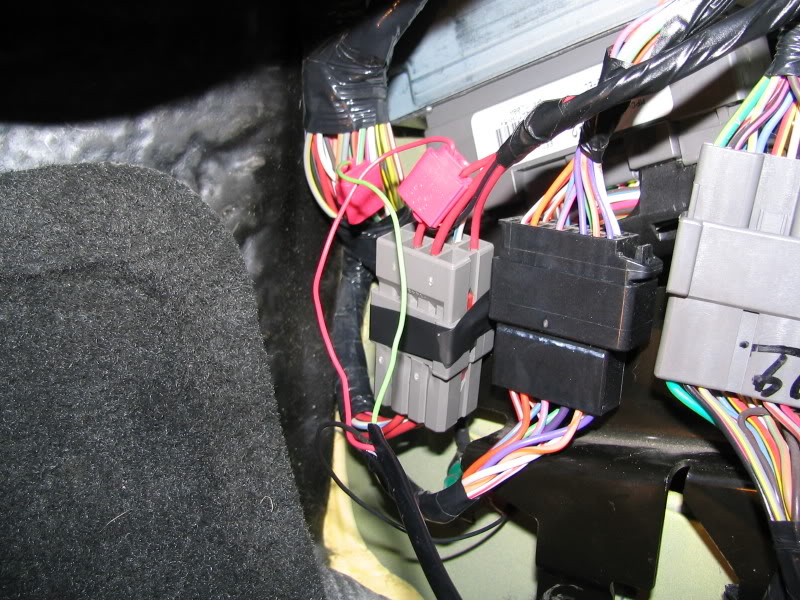
Loosen this bolt (13/32 in). It is much easier to access this if you unplug the three connections and move them out of the way. They are held together with little push clips that need to be either depressed or pulled away to unplug them. The bottoms of the plugs are held on by white clips that slid up the back of the plug and clip at the top. Pull the tops of the clips back and slide the plug upward to free it from the black bracket.

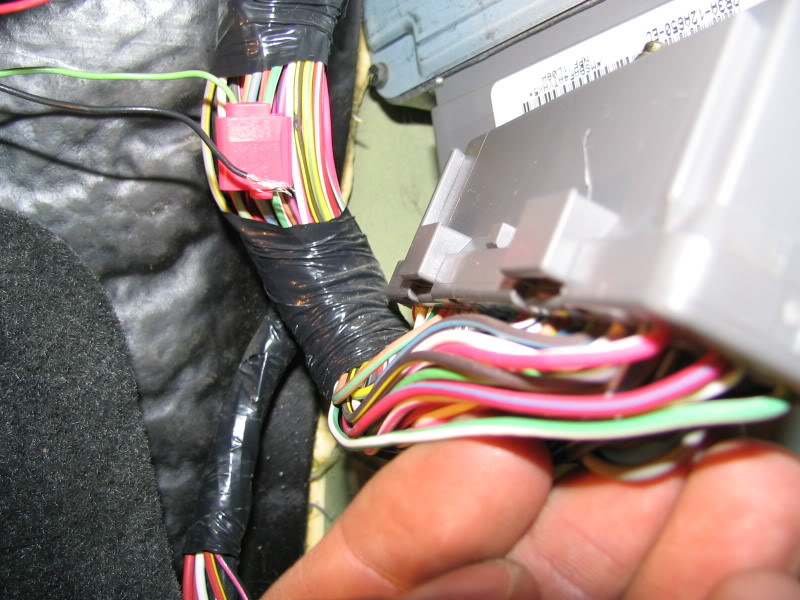
Next, take a 22 gauge scotchlok or any connector of your choice (make sure it is 22 gauge) and splice the green wire of the light with the green wire on the PCM. It is the only green wire on the corner of the connector so it is hard to miss. To gain access to this wire you must remove the black cover. It is held to the grey part buy another few clip like things. Pull it off and find the green wire. It should be the closest wire on your right if you are facing the front of the PCM. I stripped some of the plastic off the wire before I scotch locked it to make sure that the wire made contact.
Underneath the kick panel loosen the two circled bolts (7mm) to gain access to the PCM.
Loosen this bolt (13/32 in). It is much easier to access this if you unplug the three connections and move them out of the way. They are held together with little push clips that need to be either depressed or pulled away to unplug them. The bottoms of the plugs are held on by white clips that slid up the back of the plug and clip at the top. Pull the tops of the clips back and slide the plug upward to free it from the black bracket.
Next, take a 22 gauge scotchlok or any connector of your choice (make sure it is 22 gauge) and splice the green wire of the light with the green wire on the PCM. It is the only green wire on the corner of the connector so it is hard to miss. To gain access to this wire you must remove the black cover. It is held to the grey part buy another few clip like things. Pull it off and find the green wire. It should be the closest wire on your right if you are facing the front of the PCM. I stripped some of the plastic off the wire before I scotch locked it to make sure that the wire made contact.
#6
12-01-2006, 02:42 AM
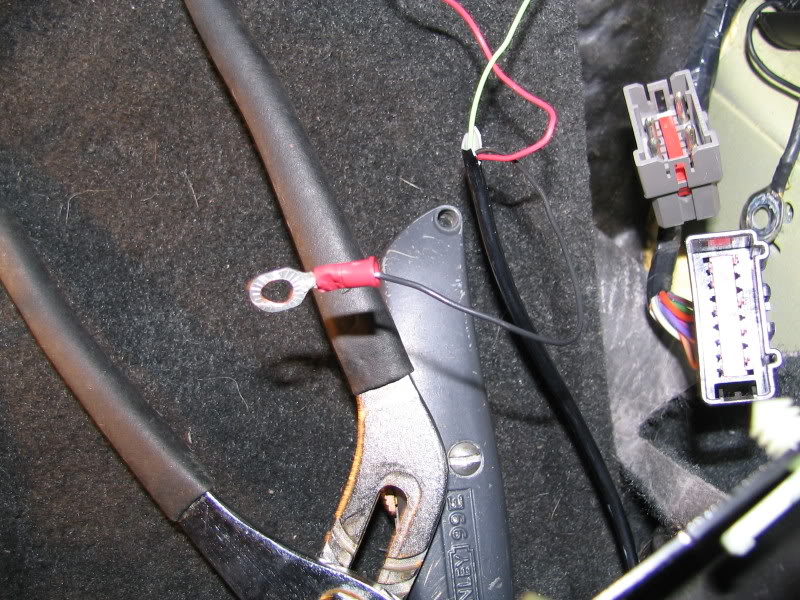
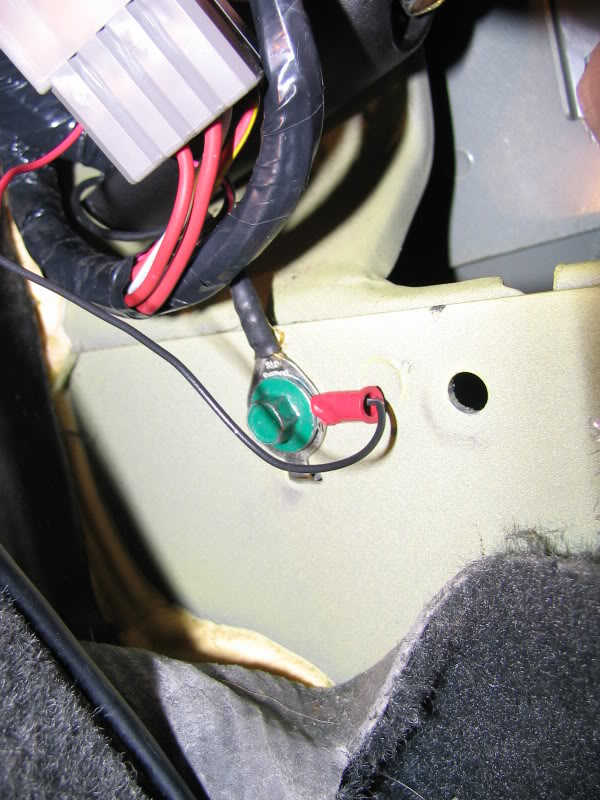
Next, take the black ground wire of the light and bolt it to the green bolt that was circled earlier in one of the other photos. It says to just wrap the wire around the bolt (10 mm) and then bolt it back down, but I chose a more secure approach by buying a different eye connector and crimping it on to the end of the wire.
Lastly, find the farthest left plug and locate the farthest left red wire. This is the switched and fused 12V source. Repeat the same procedure as with the PCM wire. (Make sure both use a 22 gauge scotchlok. Some people had problems when they used a scotchlok of a larger gauge.)
AND YOUR DONE! IT really is not a very difficult Install, and the light works great.
Here is a short video of my first test of it (light set to 2,200 rpm). There is snow EVERYWHERE so I won�t be able to try this out on the street yet.
#7
12-01-2006, 08:00 AM
Haul ass on regular gas
Join Date: Oct 2006
Location: San Diego, CA and Boca Raton, FL
Posts: 2,149
#8
12-01-2006, 03:30 PM
Resident Mental Patient
Join Date: Apr 2006
Location: Wappingers Falls, NuYawk
Posts: 2,834


 light looks pretty good in the vent actually
#10
12-01-2006, 10:51 PM

Great work! Nice write up.
I have one and installed it the same place, but you don't have to remove anything on the pod. all you need to do is remove the screw and pu the light in place. I simply tucked the wires in the pod w/o taking anything out. It was pretty simple. The wires are completely out of site.
I have one and installed it the same place, but you don't have to remove anything on the pod. all you need to do is remove the screw and pu the light in place. I simply tucked the wires in the pod w/o taking anything out. It was pretty simple. The wires are completely out of site.

Thread
Thread Starter
Forum
Replies
Last Post